

Introduction

Welcome to the Estonian Internet Foundation's eeID documentation! This document describes the technical characteristics of the Estonian Internet Foundation eeID services and includes advice for interfacing the client application with e-services. The Estonian Internet Foundation's eeID services offer a robust and secure framework for identity management, enabling both authentication and identification processes for users and organizations.
Key Components
eeID Authentication Service:
- The authentication service is based on the OpenID Connect protocol, which is an extension of the OAuth 2.0 framework. It provides a standardized method for verifying user identities across various applications and platforms.
- Users can authenticate using multiple methods, including Mobiil-ID, ID card, Smart-ID, EU-citizen cross-border authentication and FIDO2 Web Authentication (Passkey Authentication). This flexibility allows organizations and private individuals to choose the most suitable authentication method for their needs.
- The service issues identity tokens that contain essential user information, enabling applications to confirm identities and manage user access securely.
eeID Signing Service:
- The signing service produces qualified electronic signatures on documents, using the same methods users already authenticate with: Smart-ID, Mobile-ID and the ID card. A qualified signature is legally equivalent to a handwritten one across the EU.
- The result is an ASiC-E container with a long-term-valid signature — timestamped and with a revocation check embedded — which is what Estonian counterparties and the DigiDoc4 client expect.
- Signing runs either on a page eeID hosts, or headlessly against your own interface. In hash-only mode eeID is given the document's digests and never receives the document itself.
eeID Identification Service:
- The identification service complements the authentication service by providing an API for creating identification requests and verifying user identities based on specific criteria, such as unique identifiers (subject) or personal details (name).
- Organizations can initiate identification requests to confirm user identities. eeID records whether the authenticated data matches the claims you provided (
claims_matched), but authentication success is separate from business match — your service decides how to handle mismatches (for example manual review, approval, or rejection). - This service is particularly valuable in sectors that require stringent identity verification, such as finance, healthcare, government, and domain registries, especially in light of the recently applied NIS2 directive, which emphasizes the importance of robust cybersecurity measures and identity verification processes.
- By streamlining the identification process, the service enhances security and efficiency, allowing organizations to manage user verification seamlessly.
OpenID Connect
The eeID is based on the OpenID Connect protocol (OIDC), which is built on top of the OAuth 2.0 authorization framework. It's designed to provide a secure and standardized way to authenticate users and obtain their basic profile information. OIDC is commonly used in applications that require user authentication, such as web and mobile applications.
Limited subset from standards was chosen and some adjustments were made. The main selections and adjustments compared to the full OpenID Connect protocol are the following:
- The services support the authorization code flow. The authorization code flow is deemed the most secure option and is thus appropriate for public services.
- All information about an authenticated user is transferred to the application in an ID token.
- The eIDAS assurance level is also transferred to the application if it is known (in the
acrstatement). - The authentication method is selected by the user in the authentication service or by the interfaced client with the scope parameter.
- Cross-border authentication based on the technical specification of eIDAS.
- Dynamic registration of the client application is not supported. The client application is registered in eeID manager by a separate procedure.
Getting Started
Creating an account
To get started with eeID, you'll need to create a free personal account and verify your email address. Every person who uses eeID signs in to a user account. Your user account is your identity on eeID and has a personal profile.
Navigate to https://eeid.ee/.
You have two options to create an account:
Option 1: Create Account Form
- Click
CREATE AN ACCOUNT. - Fill in the registration form with your:
- Email address
- Password (must be at least 8 characters)
- First name
- Last name
- Phone number
- Country
- Accept the Terms and Conditions.
- Click
SIGN UP. - Verify your email address by clicking the link sent to your inbox.
Option 2: Sign in with eeID Authentication
- Click
SIGN IN WITH eeID. - Choose your preferred authentication method:
- ID card
- Mobile-ID
- Smart-ID
- EU citizen authentication
- Passkey
- Complete the authentication process
- After successful authentication, you'll be redirected to a pre-filled registration form containing your:
- First name
- Last name
- Personal identification code
- Country
- Complete any remaining required fields:
- Email address
- Phone number
- Accept the Terms and Conditions
- Click
Create Account - Verify your email address by clicking the link sent to your inbox.
After creating your account and verifying your email, you can log in and start using eeID services.
Types of accounts
User accounts
If you signed up for your own account on eeID, you are using a personal account. Personal accounts represent individual users and have a unique profile with verified identity information. With a personal account, you can:
- Create and manage your own services
- Join or create organizations
- Authenticate using various methods (ID card, Mobile-ID, Smart-ID, etc.)
- Create and manage passkeys for passwordless authentication
All personal accounts can own an unlimited number of services.
Organization accounts
Organization accounts enable teams to work together on shared services under a single account. They provide an effective way for businesses, non-profits, and other groups to collectively manage their services.
Like user accounts, organizations can own services. However, you cannot sign in directly to an organization. Instead, each person signs in to their personal user account, and any actions the person takes on organization resources are attributed to their user account. Each user can be a member of multiple organizations.
The users within an organization can be given different roles, which grant different levels of access to the organization and its data:
Organization Owner: Has complete administrative access to the organization, including the ability to edit organization data, add/remove members and manage billing. For security reasons, it's recommended to have at least two organization owners.
Organization Member: The default role with permissions to create and update services and view authentication information.
All organizations can own an unlimited number of services, making them suitable for businesses of any size.
Creating a new organization
When you create a new organization, it doesn't have any services associated with it. For more information on adding services to your organization, see Creating a new service and Transferring a service.
From the main menu select
Organizationsto go to the organization management view. Click on+ Create New Organziation.Follow the prompts to create your organization:
- Organization name - enter the name for your organization.
- Contact email - enter the email address that will be used for communications regarding the organization and its services.
- Description - provide a brief description of your organization and its purpose.
- URL - enter your organization's website URL (optional).
- Locale - select the preferred language for communications with your organization.
Setting your billing info
Your account's billing info is where eeID sends receipts and other billing-related information. You can set up billing information for both personal and organization accounts.
For personal accounts:
- From the main menu select
Accountto go to your profile view - Click
Edit details - Under
Billing datafill in the following information:- Billing recipient name*
- Billing email address*
- IBAN (for automatic payments)
- Country*
- VAT number (if applicable)
- Registration code
- Street address
- City
- Postal code
For organization accounts:
- Navigate to your organization by either:
- Selecting
Organizationsfrom the main menu and clicking the organization name, or - Using the account dropdown menu in the top navigation bar
- Selecting
- Click
Accountfollowed bySettings. - Locate the
Billing datasection and complete the required billing information fields.
Fields marked with * are required. Organization owners can edit billing information, while regular members can only view it.
You can also enable automatic balance reloading for both personal and organization accounts to ensure uninterrupted service.
Creating a new service
You can create a new service on your personal account or any organization where you have sufficient permissions.
- From the main menu select
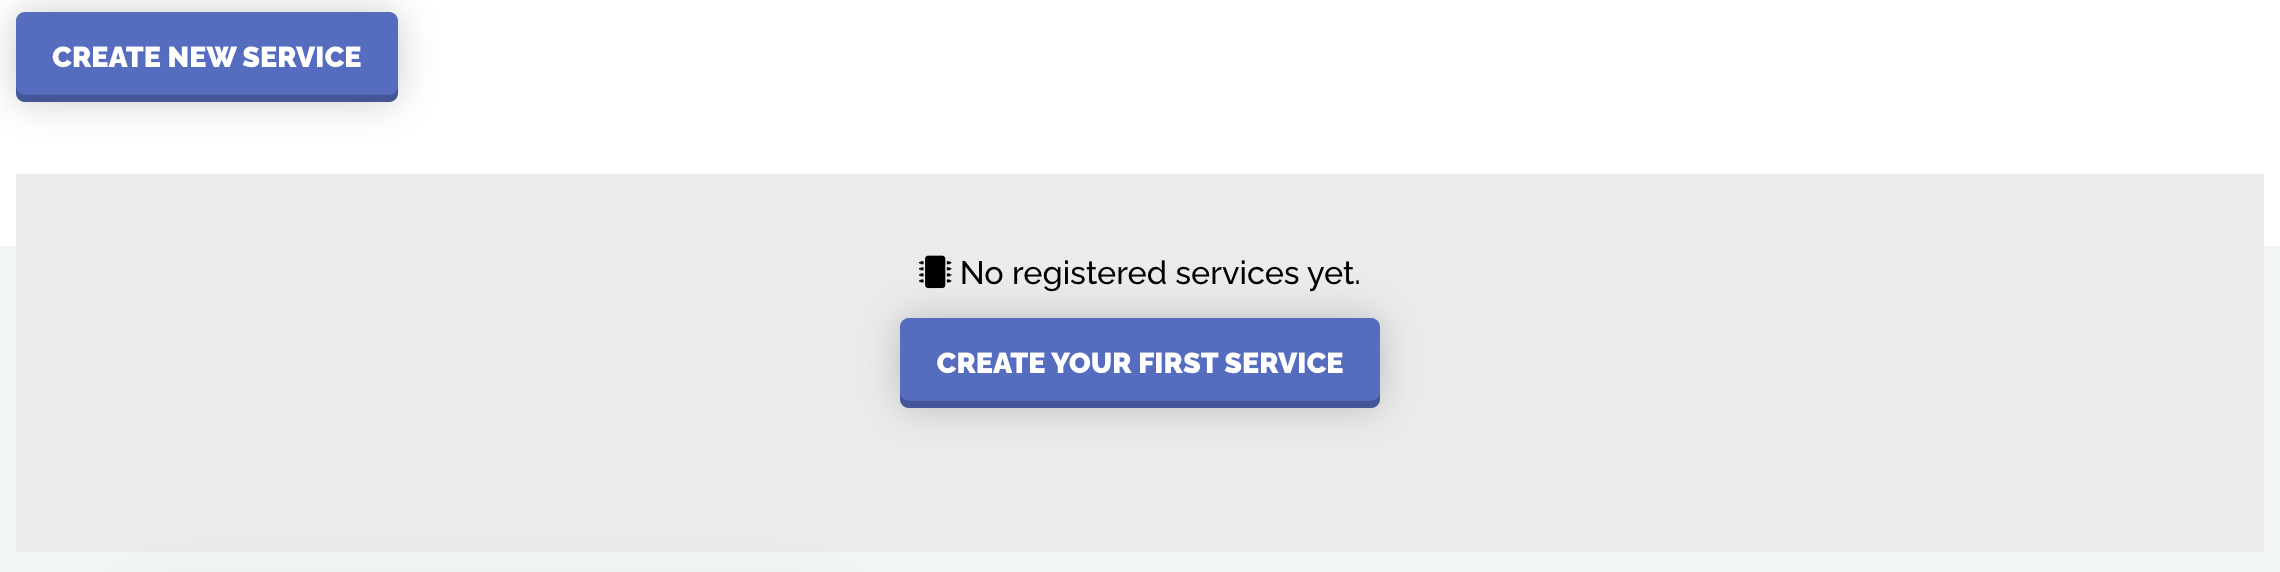
Servicesto go to the service management view. Click on+ Create New Service.
- Fill in the form
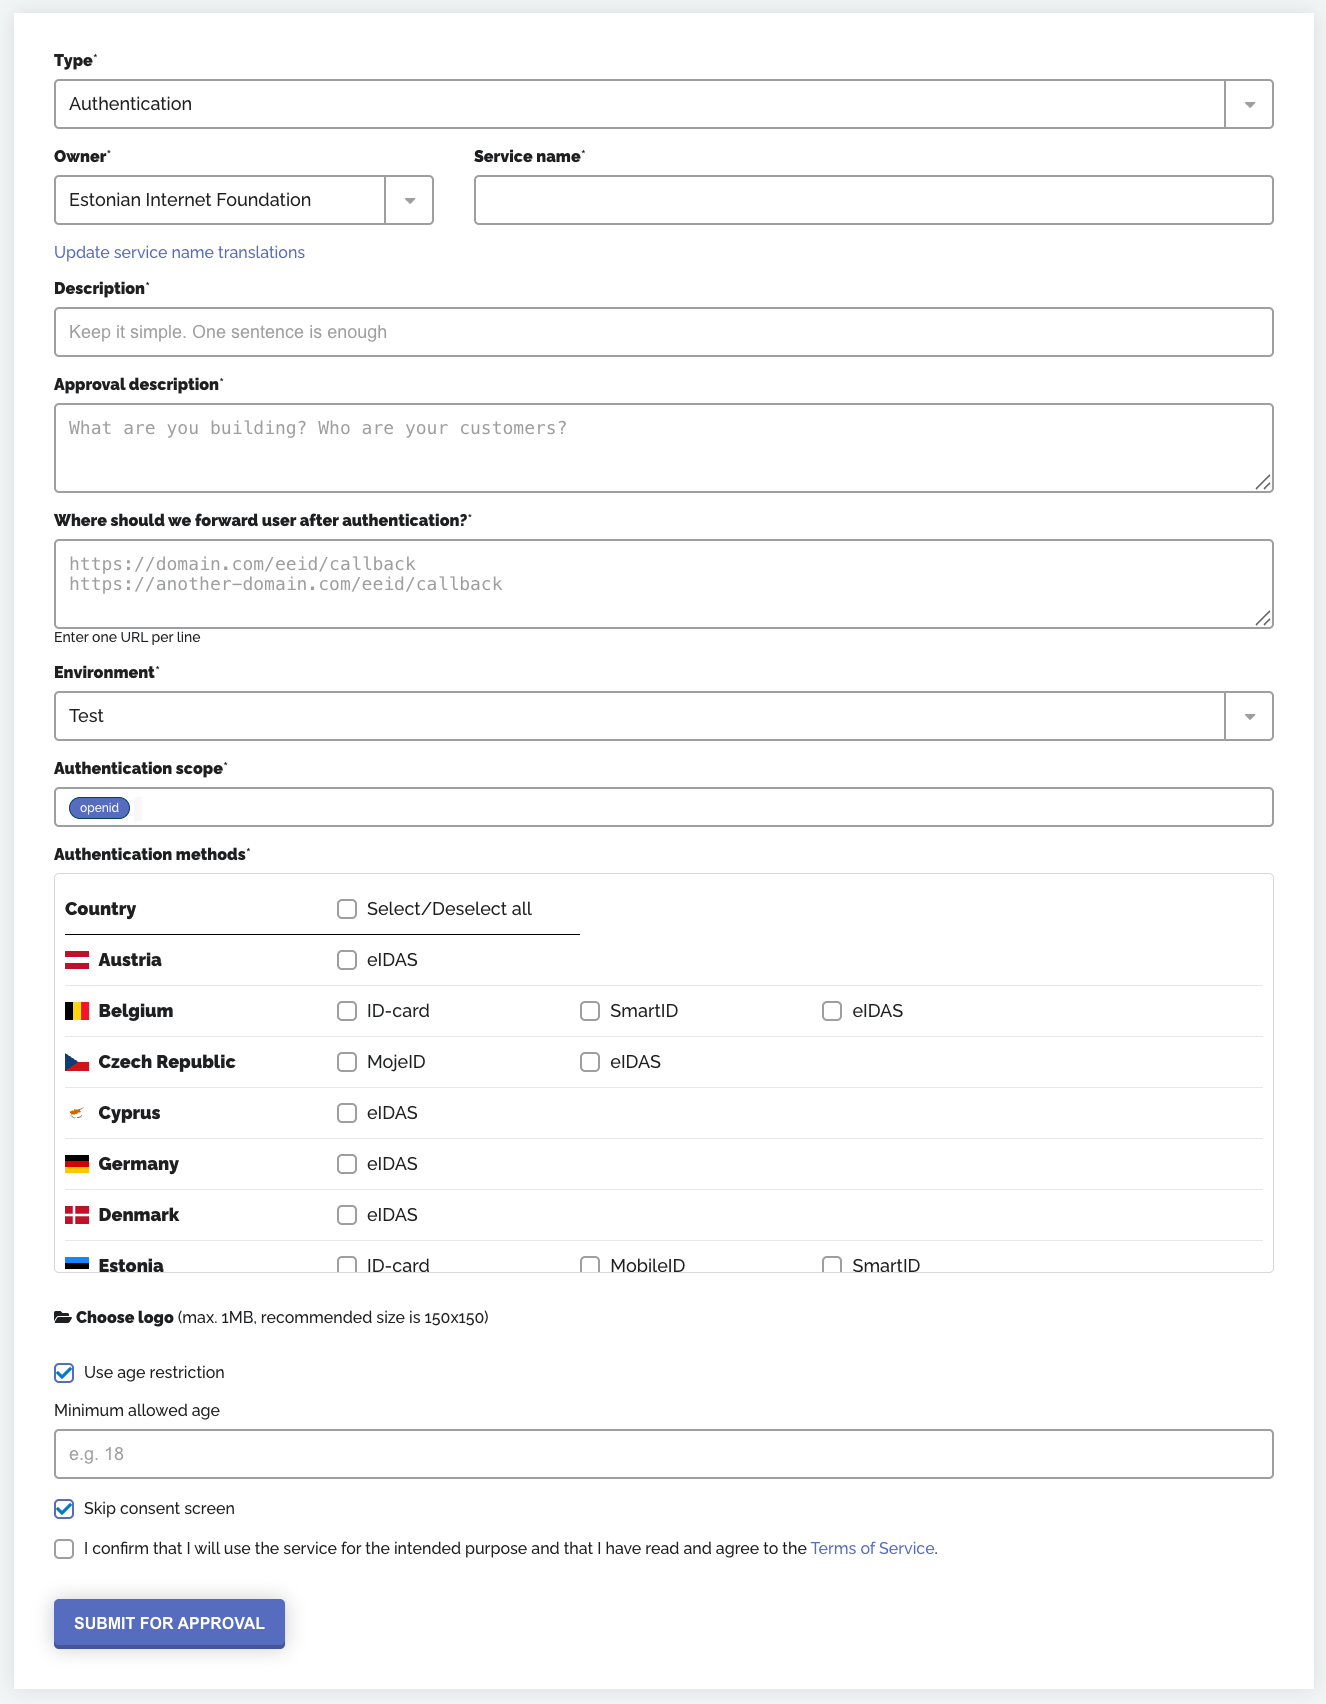
- All the fields must be valid to proceed.
- Type - enter the type of your service (
AuthenticationorIdentification). - Owner - select who will own this service - either your personal account or an organization you belong to. The owner will be responsible for managing the service settings, billing, and access control.
- Service name - enter the name for your service. NB! This will ultimately appear in-front of your customers. You can provide translations of the service name in multiple languages (English, Estonian, and Russian) by clicking the "Update name translations" link below the service name field. This allows your service to display a localized name to users based on their language preference. If translations are not provided, the default service name will be used.
- Description - provide a brief description of your service. It should be concise, ideally one sentence.
- Approval description - in this field, provide details about what you are building and who your target customers are.
- Redirection URLs (
Authentication) - specify one or more URLs where users should be redirected to after they have been authenticated. You can enter multiple URLs by placing each URL on a separate line in the textarea field. If you do not know what you will use, just enterhttp://localhost/callbackfor now. The value can be changed later if needed. NB! Ensure that redirect URLs use the HTTPS protocol. HTTP is only permitted for local development environments (e.g., localhost). - Webhook URL (
Identification) - specify the URL where the service will send notifications about the status of identification requests. This is a critical field for services that require real-time updates on the verification process. Ensure the provided URL is secure (HTTPS) and can handle incoming requests. The path must containeeid/webhooks/identification_requests. - Environment - indicate the environment in which you will be using the service.
Testis free and used for testing purposes. - Authentication scope - choose the authentication scope you wish to support. See the Authentication scope section for more details. The following scopes are supported:
openid,webauthn,phoneandemail. - Authentication methods - choose the authentication methods you wish to support. You can select one or more methods based on your preferred country.
- Consent screen (
Authentication) - configure it to skip the "consent screen", which is the screen where the user must explicitly agree to giving the service access to their data and allow perform operations on their behalf. - Choose logo (
Authentication) - upload a logo for your service. - Age restriction (
Authentication, optional) - enable age restriction and set a minimum age for your service. When enabled, eeID checks the authenticated user's date of birth (if present) against the configured minimum age before finalizing consent. If the requirement is not met, the authorization is rejected and the client application receives anaccess_deniederror. NB! Latvian eParaksts and SmartID authentication methods do not provide birthdate at the moment. Age restriction cannot be enforced for users authenticating with these methods, as the required birthdate information will not be available. - Submission - review all the details entered in the form, and if everything is correct, click on
SUBMIT FOR APPROVALto submit your service.
Once you submit the form, it will be reviewed by the service administrators
at the Estonian Internet Foundation
They will assess the details provided in your application to ensure
they meet the necessary criteria and adhere to the terms of use.
If your application meets all the requirements, it will be approved and you will be provided with the Client ID and Secret.
In case there are issues or discrepancies in your application, it might be rejected.
After the review process is completed, you will receive a notification regarding the
status of your application. This notification will inform you whether your application has
been approved or rejected.
Transferring a service
You can transfer services between your personal account and organization accounts. After transferring a service, the new owner will have full administrative access to manage the service's settings and resources. During the transfer process, you have the option to rename the service if desired.
Before transferring a service, ensure you meet these requirements:
- You must be the owner of the service you want to transfer
- The recipient (user or organization) must have permissions to create services
- The receiving account cannot have an existing service with the same name
- You can transfer a service owned by an organization to your personal account or to another organization only if you have an owner role in the source organization
Note that when a service is transferred, all new transactions and authentication records will also be transferred to the new owner.
Navigate to the main page of the service.
Under your service name, click
Transfer Service.Select the dropdown menu and click an organization or a user.
Optionally, in the "Service name" field, type a new name for the service.
Click
Submit
Authentication scope
By default, the eeID services facilitate the following authentication scope:
openid- compulsory (required by the OpenID Connect protocol).phone- can be used to request the user’s phone number in the identity token. This option is targeted for client applications that use i.e Mobile-ID, which requires user’s phone number for input, as a means for giving digital signatures. The claimsphoneandphone_number_verifiedare issued in the identity token. For example:
"sub": "EE60001019906",
"phone_number": "+37200000766",
"phone_number_verified": true
email- can be used to request the user’s e-mail address in the identity token. This option is targeted for the client applications that require verification of an e-mail address in authentication of a user. The claimsemailandemail_verifiedare issued in the identity token. For example:
"sub": "EE60001019906",
"email": "60001019906@eesti.ee",
"email_verified": false
webauthn- authentication scope leverages passkeys, a cutting-edge technology that replaces traditional passwords with a more secure and user-friendly approach. Passkeys, as described in FIDO Alliance's Passkeys 101, utilize public key cryptography to enable users to authenticate using local authenticators such as biometrics, security keys, or other trusted devices. This method simplifies the authentication process while significantly enhancing security, providing a seamless and secure experience for users across the web.
Passkeys
Passkeys provide a convenient way to streamline future authentications after initial identity verification. They leverage the WebAuthn standard to allow users to authenticate using their device's built-in security features like fingerprint sensors, facial recognition, or PIN codes.
What are Passkeys in eeID?
After authenticating through eeID's primary authentication methods (like Mobile-ID, Smart-ID, or ID-card), users can create a passkey - a cryptographic credential tied to their verified identity. This passkey can then be used for subsequent authentications from the same device, making the process faster while maintaining security. The passkey works by creating a cryptographic key pair where the private key stays securely on the user's device.
Key Benefits
- Streamlined Re-authentication: Once identity is verified through eeID's primary methods, subsequent logins can be completed quickly using device biometrics or PIN
- Device-Specific Security: Passkeys are securely stored on user devices and can't be phished or compromised
- Convenience: Eliminates the need to repeatedly use primary authentication methods while maintaining security
- Multi-device Support: Passkeys can be synchronized across a user's trusted devices through cloud services
- Enhanced User Experience: Provides a faster authentication option while preserving eeID's strong identity verification
How They Work with eeID
- User first authenticates using a primary eeID method to verify their identity
- User can then create a passkey for that device
- For future authentications from that device, user can choose to use their passkey
- Authentication is completed by using the device's built-in authenticator (fingerprint, face, or PIN)
Passkeys complement eeID's existing authentication methods by providing a secure and convenient option for subsequent authentications while maintaining the high security standards required for identity verification.
Creating a passkey
Initial Authentication Before creating a WebAuthn credential (passkey), users must first verify their identity using an authentication method provided by the eeID service or, if unavailable, an AI-powered identity verification platform (Veriff). This step is crucial for ensuring the user's identity is securely verified through a recognized and trusted authentication method.
eeID as Identity Provider Once the initial authentication is successful, the eeID service acts as an identity provider. In this role, it verifies and stores the authenticated data, establishing a secure and trusted identity framework for the user.
Creating the Webauthn Credential (passkey) Following the successful authentication through eeID, the user can proceed to create a passkey. This process involves:
- Registering a Local Authenticator. The user will register a local authenticator, such as a biometric identifier (fingerprint, facial recognition, etc.) or a security key.
- Public Key Cryptography. The WebAuthn method leverages public key cryptography, where a private key is stored on the user's local device, and a public key is stored on the server. This setup ensures a secure and password-less authentication process.
- Credential ID. Upon successful registration, a unique Credential ID is generated, which will be used for future authentications.
Future Authentications
With the passkey created, the user can now use this method for future authentications. When logging in:- The user will be prompted to authenticate using their local authenticator.
- The server verifies the authentication using the stored public key, ensuring a secure and swift login process.
Deleting a passkey
It's important to manage your passkeys securely. You may want to delete a passkey if:
- Your device has been lost or stolen
- You no longer use a particular device
- You suspect unauthorized access
- You're selling or giving away a device
- You want to refresh your security credentials
There are two ways to remove passkeys, each affecting different parts of the credential pair:
- Device-specific Deletion
This removes the private key stored on your device. You should do this before selling/disposing of devices:- For Windows: Navigate to Settings > Accounts > Passkeys to manage your passkeys. For detailed instructions, see the Windows Passkey Management Guide
- For macOS: Go to the Passwords app on your Mac. For detailed instructions, see the macOS Passkey Management Guide
- For iOS: Go to the Passwords app. For detailed instructions, see the iOS Passkey Management Guide
- For Android: Go to Google Account > Security > Passkeys and security keys. For detailed instructions, see the Android Passkey Management Guide
- For Chrome: Go to Settings > Autofill and passwords > Passkeys. For detailed instructions, see the Chrome Passkey Management Guide
- eeID Manager Deletion
This removes the public key stored on eeID servers, effectively invalidating the credential pair:- Log in or create a personal account in eeID Manager
- Navigate to your Account page
- Under "Sign in and security", click
Show Passkeys - Find the passkey you want to remove and click the delete button
- Confirm the deletion
For maximum security when compromised:
- Delete the passkey from your device to remove the private key
- Delete it from eeID Manager to remove the public key
- Create a new passkey after authenticating with a primary method
Note that deleting a passkey means you'll need to use a primary authentication method (like Mobile-ID or Smart-ID) for your next sign-in from that device. This is a security measure to ensure only you can create new passkeys for your account.
If you suspect unauthorized access, you should delete the passkey immediately through eeID Manager even if you don't have access to the device. This will prevent anyone from using that passkey to access your account, as the public-private key pair must both be valid for authentication to succeed.
eeID Authentication
Requests
Authentication request
An authentication request is a HTTP GET request by which the user is redirected from the client application to the eeID server for authentication.
URL: https://auth.eeid.ee/hydra-public/oauth2/auth
Required query parameters:
client_id- service identifier issued upon registration of the client application in eeID portalstate- security code against false request attacks (cross-site request forgery CSRF)redirect_uri- redirect_uriresponse_type- determines the manner of communication of the authentication result to the server, must be equal tocodescope- authentication scope. The scope must correspond to the authentication scope selected while registering the service.
Optional query parameters:
ui_locales- selection of the user interface language. The following languages are supported:et,en,rucountry- preselects the country on the eeID authentication page. Use an ISO 3166-1 alpha-2 country code in uppercase, for exampleEE,LV,LT,SE. If the provided country is not supported by the service configuration, eeID ignores the parameter.nonce- unique parameter which helps to prevent replay attacks based on the protocolcode_challenge_method- required for PKCE/public clients, must beS256code_challenge- required for PKCE/public clients, base64url-encoded SHA-256 hash ofcode_verifier
An example of an authentication request:
GET https://auth.eeid.ee/hydra-public/oauth2/auth?client_id=oidc-b8ab3705-c25f-4271-b87d-ecf190aa4982-11
&redirect_uri=https%3A%2F%2Feservice.institution.ee%2Fcallback
&response_type=code
&scope=openid%20webauthn
&state=f3b2c3e7f4cf0bed3a783ed6ece617e3
&country=LV
Example for PKCE/public client:
GET https://auth.eeid.ee/hydra-public/oauth2/auth?client_id=oidc-b8ab3705-c25f-4271-b87d-ecf190aa4982-11
&redirect_uri=https%3A%2F%2Feservice.institution.ee%2Fcallback
&response_type=code
&scope=openid
&state=f3b2c3e7f4cf0bed3a783ed6ece617e3
&code_challenge_method=S256
&code_challenge=R8Kf3up4QxQhM9E7Q4P1H0IrbIee8f4Y2m5kY2C4QGA
Redirect request
The redirect request is a HTTP GET request which is used to redirect the user back to the return address entered upon registration of the client application in eeID manager. In the redirect request an authorization code is sent to the client application, based on which the client application will request the access token in order to get personal identification code, name and other attributes of the authenticated person. The security code state received in the authentication request is mirrored back. Read more about forming and verifying state from Protection against false request attacks.
An example of a redirect request:
GET https://eservice.institution.ee/callback?code=71ed5797c3d957817d31&
state=OFfVLKu0kNbJ2EZk
Request might contain other URL parameters, that client application must ignore.
If eeID is unable to process an authentication request - there will be an error in the request. eeID transfers an error message (URL parameter error) and the description of the error (URL parameter error_description) in the redirect request:
GET https://eservice.institution.ee/callback?error=invalid_scope&error_description=
The+requested+scope+is+invalid%2C+unknown%2C+or+malformed.+The+OAuth+2.0+Client+is+not+allowed+to+request+scope+%27invalid_scope%27.
&state=0b60fe50138f8fdd56afd2a6ab7a40f9
If the service has age restriction enabled and the authenticated user does not meet the configured minimum age, eeID returns an authorization error:
GET https://eservice.institution.ee/callback?error=access_denied&error_description=
User+must+be+at+least+18+years+old.
&state=0b60fe50138f8fdd56afd2a6ab7a40f9
Redirect request errors can be caused by both technical issues (for example, misconfiguration) and policy decisions (for example, age restriction). The client application should always check whether an error parameter is present and handle it accordingly.
Identity token request
The identity token request is an HTTP POST request which is used by the client application to request the identity token from the login server of eeID.
An example of an identity token request:
POST https://auth.eeid.ee/hydra-public/oauth2/token
Authorization: Basic czZCaGRSa3F0MzpnWDFmQmF0M2JW
Content_Type: application/x-www-form-urlencoded
grant_type=authorization_code&
code=71ed5797c3d957817d31&
redirect_uri=https%3A%2F%2Feservice.institution.ee%2Fcallback
There are two supported client authentication modes for token request:
- Confidential client (
token_endpoint_auth_method=client_secret_basic): includeAuthorization: Basic base64(<client_id>:<client_secret>). - Public PKCE client (
token_endpoint_auth_method=none): do not send client secret, sendclient_idandcode_verifierin request body.
The body of the HTTP POST request must be presented in a serialised format based on the OpenID Connect protocol. The body of the request must include the code received from the authentication service.
The body of the request must include the following parameters:
| Element | Description |
|---|---|
grant_type |
The authorization_code value required based on the protocol |
code |
The authorization code received from the authentication service |
redirect_uri |
The redirect URL sent in the authorisation request |
client_id |
Required for public PKCE clients |
code_verifier |
Required for public PKCE clients. Must match the code_challenge sent in the auth request |
PKCE/public client token request example:
POST https://auth.eeid.ee/hydra-public/oauth2/token
Content-Type: application/x-www-form-urlencoded
grant_type=authorization_code&
client_id=oidc-b8ab3705-c25f-4271-b87d-ecf190aa4982-11&
code=71ed5797c3d957817d31&
redirect_uri=https%3A%2F%2Feservice.institution.ee%2Fcallback&
code_verifier=Z1YvSmg2a3R0R0l0Y1VxV1A4N3hGQ09mR2xPZTlQd3Y5bnN4WDBqYl91QkN4VQ
PKCE requirement follows OAuth2 Authorization Code + PKCE best practices. For flow details and rationale, see Ory documentation: OAuth2 authorization code flow.
The server verifies that the identity token is requested by the right application and issues the identity token included in the response body. The response body uses JSON format consisting four elements:
| Element | Description |
|---|---|
access_token |
OAuth 2.0 access certificate. With access token the client application can issue authenticated user’s data from userinfo endpoint. |
token_type |
OAuth 2.0 access token type with bearer value |
expires_in |
The validity period of the OAuth 2.0 access token |
id_token |
Identity token. Presented in JWS Compact Serialization form |
The identity token is a certificate of the fact of authentication issued by eeID. The identity token is issued in JSON Web Token, JWT format. The identity token is always signed. Example:
{
  "jti": "0c597356-3771-4315-a129-c7bc1f02a1b2",
  "iss": "https://auth.eeid.ee",
  "aud": "oidc-b8ab3705-c25f-4271-b87d-ecf190aa4982-12",
  "exp": 1530295852,
  "iat": 1530267052,
  "nbf": 1530266752,
  "sub": "EE60001019906",
  "profile_attributes": {
    "date_of_birth": "2000-01-01",
    "family_name": "O’CONNEŽ-ŠUSLIK TESTNUMBER",
    "given_name": "MARY ÄNN"
  },
  "amr": [
    "mID"
  ],
  "state": "1OnH3qwltWy81fKqcmjYTqnco9yVQ2gGZXws/DBLNvQ=",
  "nonce": "",
  "at_hash": "X0MVjwrmMQs/IBzfU2osvw=="
}
The following claims are presented in the identity token:
| JSON element (claim) | Description |
|---|---|
jti |
Identity token identifier |
iss |
Issuer of the certificate |
aud |
ID of a client application that requested authentication (the value of client_id field specified upon directing the user to the authentication process) |
exp |
1530295852 - expiration time of the certificate (in Unix epoch format) |
iat |
1530295852 - time of issue of the certificate (in Unix epoch format) |
nbf |
1530295852 - validity start time of the certificate (in Unix epoch format) |
sub |
The identifier of the authenticated user (personal identification code or eIDAS identifier) with the prefix of the country code of the citizen (country codes based on the ISO 3166-1 alpha-2 standard). |
profile_attributes |
The data of the authenticated user, including the eIDAS attributes |
profile_attributes.date_of_birth |
2000-01-01 - the date of birth of the authenticated user in the ISO_8601 format. |
profile_attributes.given_name |
The first name of the authenticated user |
profile_attributes.family_name |
The surname of the authenticated user |
amr |
The authentication method used for user authentication. Example values: mID - Mobile-ID, idcard - Estonian ID card, eIDAS - cross-border, smartid - Smart-ID |
acr |
high - level of authentication based on the eIDAS LoA (level of assurance). Possible values: low, substantial, high |
state |
The authentication request's state parameter value |
nonce |
The authentication request's nonce parameter value. Value is present only in case the nonce parameter was sent in the authentication request |
at_hash |
The access token hash (not used) |
email |
The user's e-mail address (if present) |
email_verified |
false - the e-mail address of the user has not been verified |
phone_number |
+37200000766 - the phone number is presented in E.164 format and prefixed by a country code (if present) |
phone_number_verified |
true - the ownership of the phone number to the authenticating user has been confirmed |
Identity token might consist of other OpenID Connect protocol based fields that are not supported by eeID.
The client application must obtain the identity token immediately or within 30 seconds (before the expiry time of the identity token).
User info request
User info request enables requesting information about an authenticated user based on a valid OAuth 2.0 access token. The request must be done by using the HTTP GET method. The access token must be presented to the user info endpoint in the HTTP header by using the Bearer Token method or as a URLi parameter.
Example 1 - transferring an access certificate in the Authorization header:
GET https://auth.eeid.ee/hydra-public/userinfo
Auhtorization: Bearer AT-20-qWuioSEtFhYVdW89JJ4yWvtI5SaNWep0
Example 2 – transferring of access certificate as an access_token parameter:
GET https://auth.eeid.ee/hydra-public/userinfo?access_token=AT-20-qWuioSEtFhYVdW89JJ4yWvtI5SaNWep0
The valid access token response is provided in the JSON format. Example:
{
  "acr": "high",
  "auth_time": 1694591147,
  "authentication_type": "SMART_ID",
  "date_of_birth": "2000-01-01",
  "expiration_time": 1851935057,
  "family_name": "O’CONNEŽ-ŠUSLIK TESTNUMBER",
  "given_name": "MARY ÄNN",
  "sub": "EE60001019906",
}
The claims included in the response are issued based on the identity token.
| JSON element (claim) | Description |
|---|---|
auth_time |
The time of successful authentication of the user |
sub |
The identifier of the authenticated user (personal identification code or eIDAS identifier) with the prefix of the country code of the citizen (country codes based on the ISO 3166-1 alpha-2 standard) |
authentication_type |
The authentication method used for user authentication. Example values: MOBILE_ID - Mobile-ID, ID_CARD - Estonian ID card, SMART_ID - Smart-ID, WEBAUTHN - Fido Webauthn |
acr |
high - level of authentication based on the eIDAS LoA (level of assurance). Possible values: low, substantial, high |
date_of_birth |
The date of birth of the authenticated user in the ISO_8601 format |
expiration_time |
The expiration time of the user information in seconds since the Unix epoch (UTC). Provided if available. This value is typically determined by the validity period of the user's identity document or authentication certificate |
given_name |
The first name of the authenticated user |
family_name |
The surname of the authenticated user |
Response body might contain other fields, that client application may ignore.
In case the access token presented to the user information endpoint is missing or is expired, an error code and a brief description about the error are returned:
{
  "error": "invalid_token",
  "error_description": "Token expired. Access token expired at '2022-10-07 14:55:34 +0000 UTC'."
}
PKCE (Proof Key for Code Exchange)
PKCE is a security extension for OAuth2 Authorization Code flow. It protects public clients (for example SPA, mobile app, desktop app) from authorization code interception attacks.
In PKCE flow, the client:
- Generates a random
code_verifier - Calculates
code_challengefrom that verifier using SHA-256 (S256) - Sends
code_challengein authorization request (/oauth2/auth) - Sends original
code_verifierin token request (/oauth2/token)
The authorization server validates that code_verifier matches the original code_challenge. If it does not match, token issuance fails.
Which mode to choose in eeID Manager
- Use
token_endpoint_auth_method=nonefor public PKCE clients. - Use
token_endpoint_auth_method=client_secret_basicfor confidential server-side clients that can safely store a client secret.
Minimal PKCE checklist
- Authorization request must include:
code_challenge_method=S256code_challenge=<base64url(sha256(code_verifier))>
- Token request must include:
grant_type=authorization_codeclient_idcoderedirect_uricode_verifier
- For PKCE/public clients, do not send client secret.
Why this matters
Without PKCE, a stolen authorization code can be exchanged for tokens by an attacker. PKCE binds the code exchange to the same client that initiated the login flow.
Protection
The client application must implement protective measures against false request attacks (cross-site request forgery, CSRF).
This can be achieved by using state security code. Using state is compulsory.
Using state with a cookie set on the client application side means that the client application itself does not have to remember the state parameter value. The process is described below.
The state security code is used to combat falsification of the redirect request following the authentication request.
The client application must perform the following steps:
- Generate a random hexadecimal state session key, for example of the length of 32 characters:
07f19702e7e9591c6fa2554e1fcf5f4a(referred to asR). - Add an order to set a cookie for the client application domain with a value of R immediately before making the authentication request, for example:
Set-Cookie ESERVICE=07f19702e7e9591c6fa2554e1fcf5f4a; HttpOnly
Where ESERVICE is a freely selected cookie name. The HttpOnly attribute must be applied to the cookie.
- Set the following value, in the authentication request, for the
stateparameter calculated based on section 1:
state=07f19702e7e9591c6fa2554e1fcf5f4a
Length of state parameter must be minimally 8 characters. In the course of processing the redirect request, the client application must:
- Take the
ESERVICEvalue of the cookie received with the request. - Verify that the
ESERVICEvalue matches the state value mirrored back in the redirect request.
The redirect request may only be accepted if the checks described above are successful.
The key element of the process described above is connection of the state value with the session. This is achieved by using a cookie.
Endpoints and timeouts
Production service
| Endpoint | URL |
|---|---|
| server discovery | https://auth.eeid.ee/hydra-public/.well-known/openid-configuration |
| public signature key | https://auth.eeid.ee/hydra-public/.well-known/jwks.json |
| authorization | https://auth.eeid.ee/hydra-public/oauth2/auth |
| token | https://auth.eeid.ee/hydra-public/oauth2/token |
| userinfo | https://auth.eeid.ee/hydra-public/userinfo |
Test service
| Endpoint | URL |
|---|---|
| server discovery | https://test-auth.eeid.ee/hydra-public/.well-known/openid-configuration |
| public signature key | https://test-auth.eeid.ee/hydra-public/.well-known/jwks.json |
| authorization | https://test-auth.eeid.ee/hydra-public/oauth2/auth |
| token | https://test-auth.eeid.ee/hydra-public/oauth2/token |
| userinfo | https://test-auth.eeid.ee/hydra-public/userinfo |
Timeouts
| Timeout | Value | Remark |
|---|---|---|
| session | 30 min | eeID server creates a session with the user identified. If the user doesn’t perform any activity on eeID page, the session will expire in 30 minutes. Note: eeID session must be distinguished from the session between the client application and the user. |
| SSL/TLS handshake | 25 s | In case of ID-card authentication. The user must enter PIN1 within 25 seconds. After the timeout, the authentication will be terminated for security reasons. |
| Authorization code | 30 s | The client application must obtain the access token using authorization code within 30 seconds. |
Testing
A prerequisite for testing the eeID authentication service is registering a service in test environment. After approving your service, it is possible to test the service immediately, using the credentials generated after approving.
Users for successful authentication:
- Mobile ID phone and id numbers: EE -
68000769|60001017869, LT -60000666|50001018865 - Smart-ID personal codes: EE -
39901012239, LV -050405-10009, LT -40504040001, BE -05040400032 - eIDAS country Czech Republic: select
Testovací profilyfrom the redirection screen and select a test user for authentication
Mobile ID
The eeID test environment is directed to the Mobiil-ID demo environment. Public test numbers are available for use:
- Test numbers are available here. Apply only Estonian (EE) test numbers and personal identification codes.
Smart ID
The eeID test environment is directed to the Smart-ID demo environment. There are two options for use:
- Install the Smart-ID demo application on your device and register a demo account.
- Use test users.
Run in Postman

Code examples
OpenID Connect Client with Spring Security
One of the key features of Spring Security 5 was the native support for OAuth2 and OIDC. Making use of the OIDC configuration information (OIDC metadata), integrating with the eeID Server gets super easy. This tutorial shows how to use a registered service to login via eeID and access the user details within an ID-token.
Prerequisites
You should be familiar with Java, Spring Boot, and Spring Security. Optionally, you should know how to use IntelliJ IDEA, but you can use any IDE of your choice. Make sure you configure an authentication service in the eeID manager before getting started.
Setting up the project
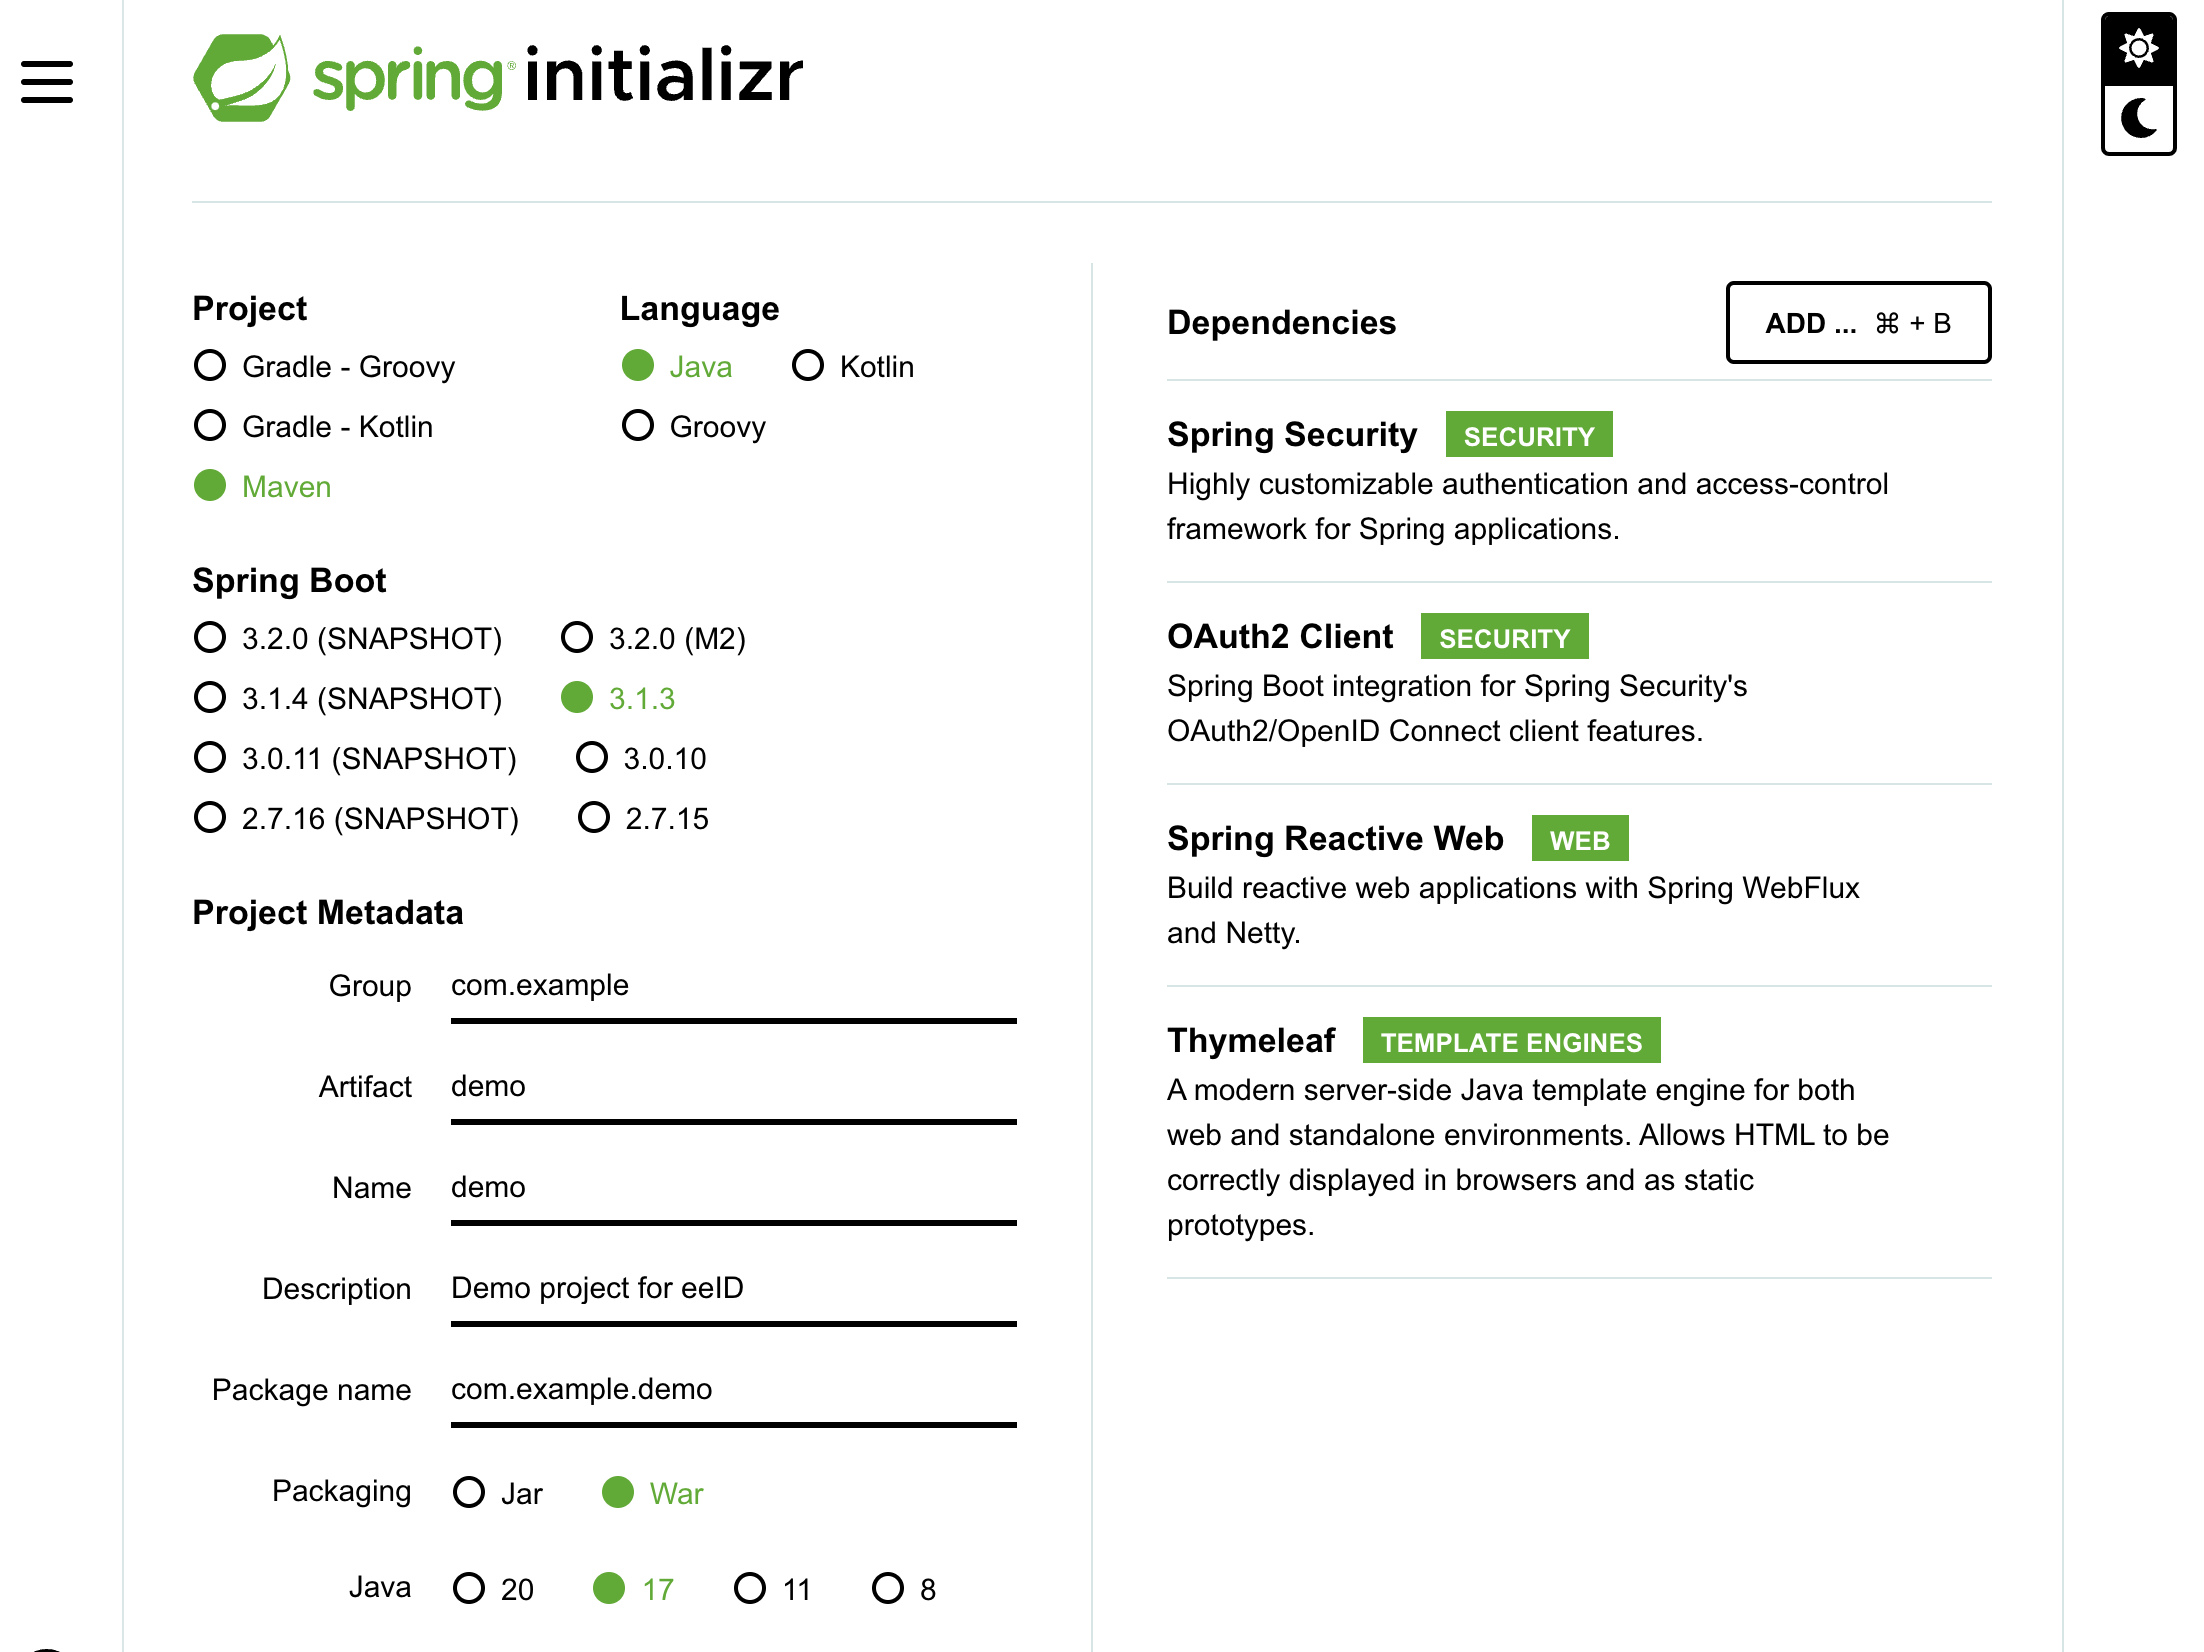
- Visit start.spring.io to create a new Spring Boot project
- Select Maven as your build tool and Java as your language
- Change the group to something meaningful and name your project
- Choose JDK 17 (or the latest available)
- Search for and add the following dependencies: Spring Security, OAuth2 Client, Spring Reactive Web, Thymeleaf
 6. Generate the application. Spring Initializr creates an archive with a bootstrap application that includes the selected dependencies. Download and extract the archive, and import the project in an IDE of your choice
Add a Starting Site
Provide a starting site that is publicly available. Create the file src/main/resources/templates/index.html.
Add a link to the protected resource /secured.
<!DOCTYPE html>
<html lang="en">
<head>
    <meta charset="UTF-8">
    <title>Spring Boot eeID Demo</title>
</head>

<body>
<h1>Welcome</h1>
<p><a href="/secured">Secured content</a></p>
</body>
</html>
Add a Controller
When the user logs in show the username. For that create a controller that handles
requests for the endpoint / and /secured. Create the file src/main/java/com/example/demo/UserController.java:
@Controller
public class UserController {
    @GetMapping("/")
    public String index(){
        return "index";
    }

    @GetMapping("/secured")
    public String user(Model model,
                        @AuthenticationPrincipal OidcUser oidcUser) {
        model.addAttribute("userName", oidcUser.getName());
        model.addAttribute("audience", oidcUser.getAudience());
        return "secured";
    }
}
Create a template called secured.html next to index.html. Output the attributes for the username and client ID.
<!DOCTYPE html>
<html xmlns="http://www.w3.org/1999/xhtml">
<head>
    <title>Spring Boot eeID Demo - Login</title>
    <meta charset="utf-8" />
</head>
<body>

<h1>Your Login Details</h1>
<div>
    Welcome <span style="font-weight:bold" th:text="${userName}"/>!
    You logged in at the OAuth 2.0 Client <span style="font-weight:bold" th:text="${audience}"/>.
</div>
</body>
</html>
With these routes in place, we can now set up our security configuration.
Protect the User Area
So far there are two unprotected endpoints: / and /secured.
Create another class, that enforces OAuth for certain paths. Create the file src/main/java/com/example/demo/OAuth2SecurityConfig.java with the following content:
@Configuration
@EnableWebFluxSecurity
public class OAuth2SecurityConfig {

    @Bean
    public SecurityWebFilterChain filterChain(ServerHttpSecurity http) throws Exception {
        http
            .authorizeExchange(authorize -> authorize
                .pathMatchers("/", "/error").permitAll()
                .anyExchange().authenticated()
            )
            .oauth2Login(oauth2 -> oauth2
                .authenticationMatcher(new PathPatternParserServerWebExchangeMatcher("/login/oauth2/callback/{registrationId}"))
            );
        return http.build();
    }
}
This enables and configures Spring Web Security.
The endpoints / and /error are public. Any other requests must be authenticated using OAuth.
Spring Security creates a default login page at /login that lists all the login options.
Configure the OAuth Client
Define the following client in src/main/resources/application.yml:
spring:
  main:
    allow-bean-definition-overriding: true
  application:
    name: demo
  security:
    oauth2:
      client:
        registration:
          eeid:
            client-name: Login with the eeID
            client-id: <your-eeid-client-id>
            client-secret: <your-eeid-secret>
            authorization-grant-type: authorization_code
            redirect-uri: "{baseUrl}/login/oauth2/callback/{registrationId}"
            scope: openid
        provider:
          eeid:
            issuer-uri: https://test-auth.eeid.ee/hydra-public
This triggers Spring Boot to register a client. The client registration gets the id eeid which is part of the (default) redirect-uri.
The remaining properties, client-id, client-secret and scope have been defined when
configuring the client in the eeID manager (see Getting Started). Make sure you configured correct callback url which is in our case must be http://localhost:8080/login/oauth2/callback/eeid.
You can choose any descriptive client-name. This is the string that is used in the default
login page setup at /login.
Spring Boot Security loads all the necessary OpenID configuration from the metadata
at https://test-auth.eeid.ee/hydra-public/.well-known/openid-configuration
and ensures that the user-agent gets redirected to the right endpoints for authentication.
Run the Demo Application
Start the demo application with mvn spring-boot:run. Navigate to http://localhost:8080 to access the index site.
Click on the link to access http://localhost:8080/secured that triggers a login.
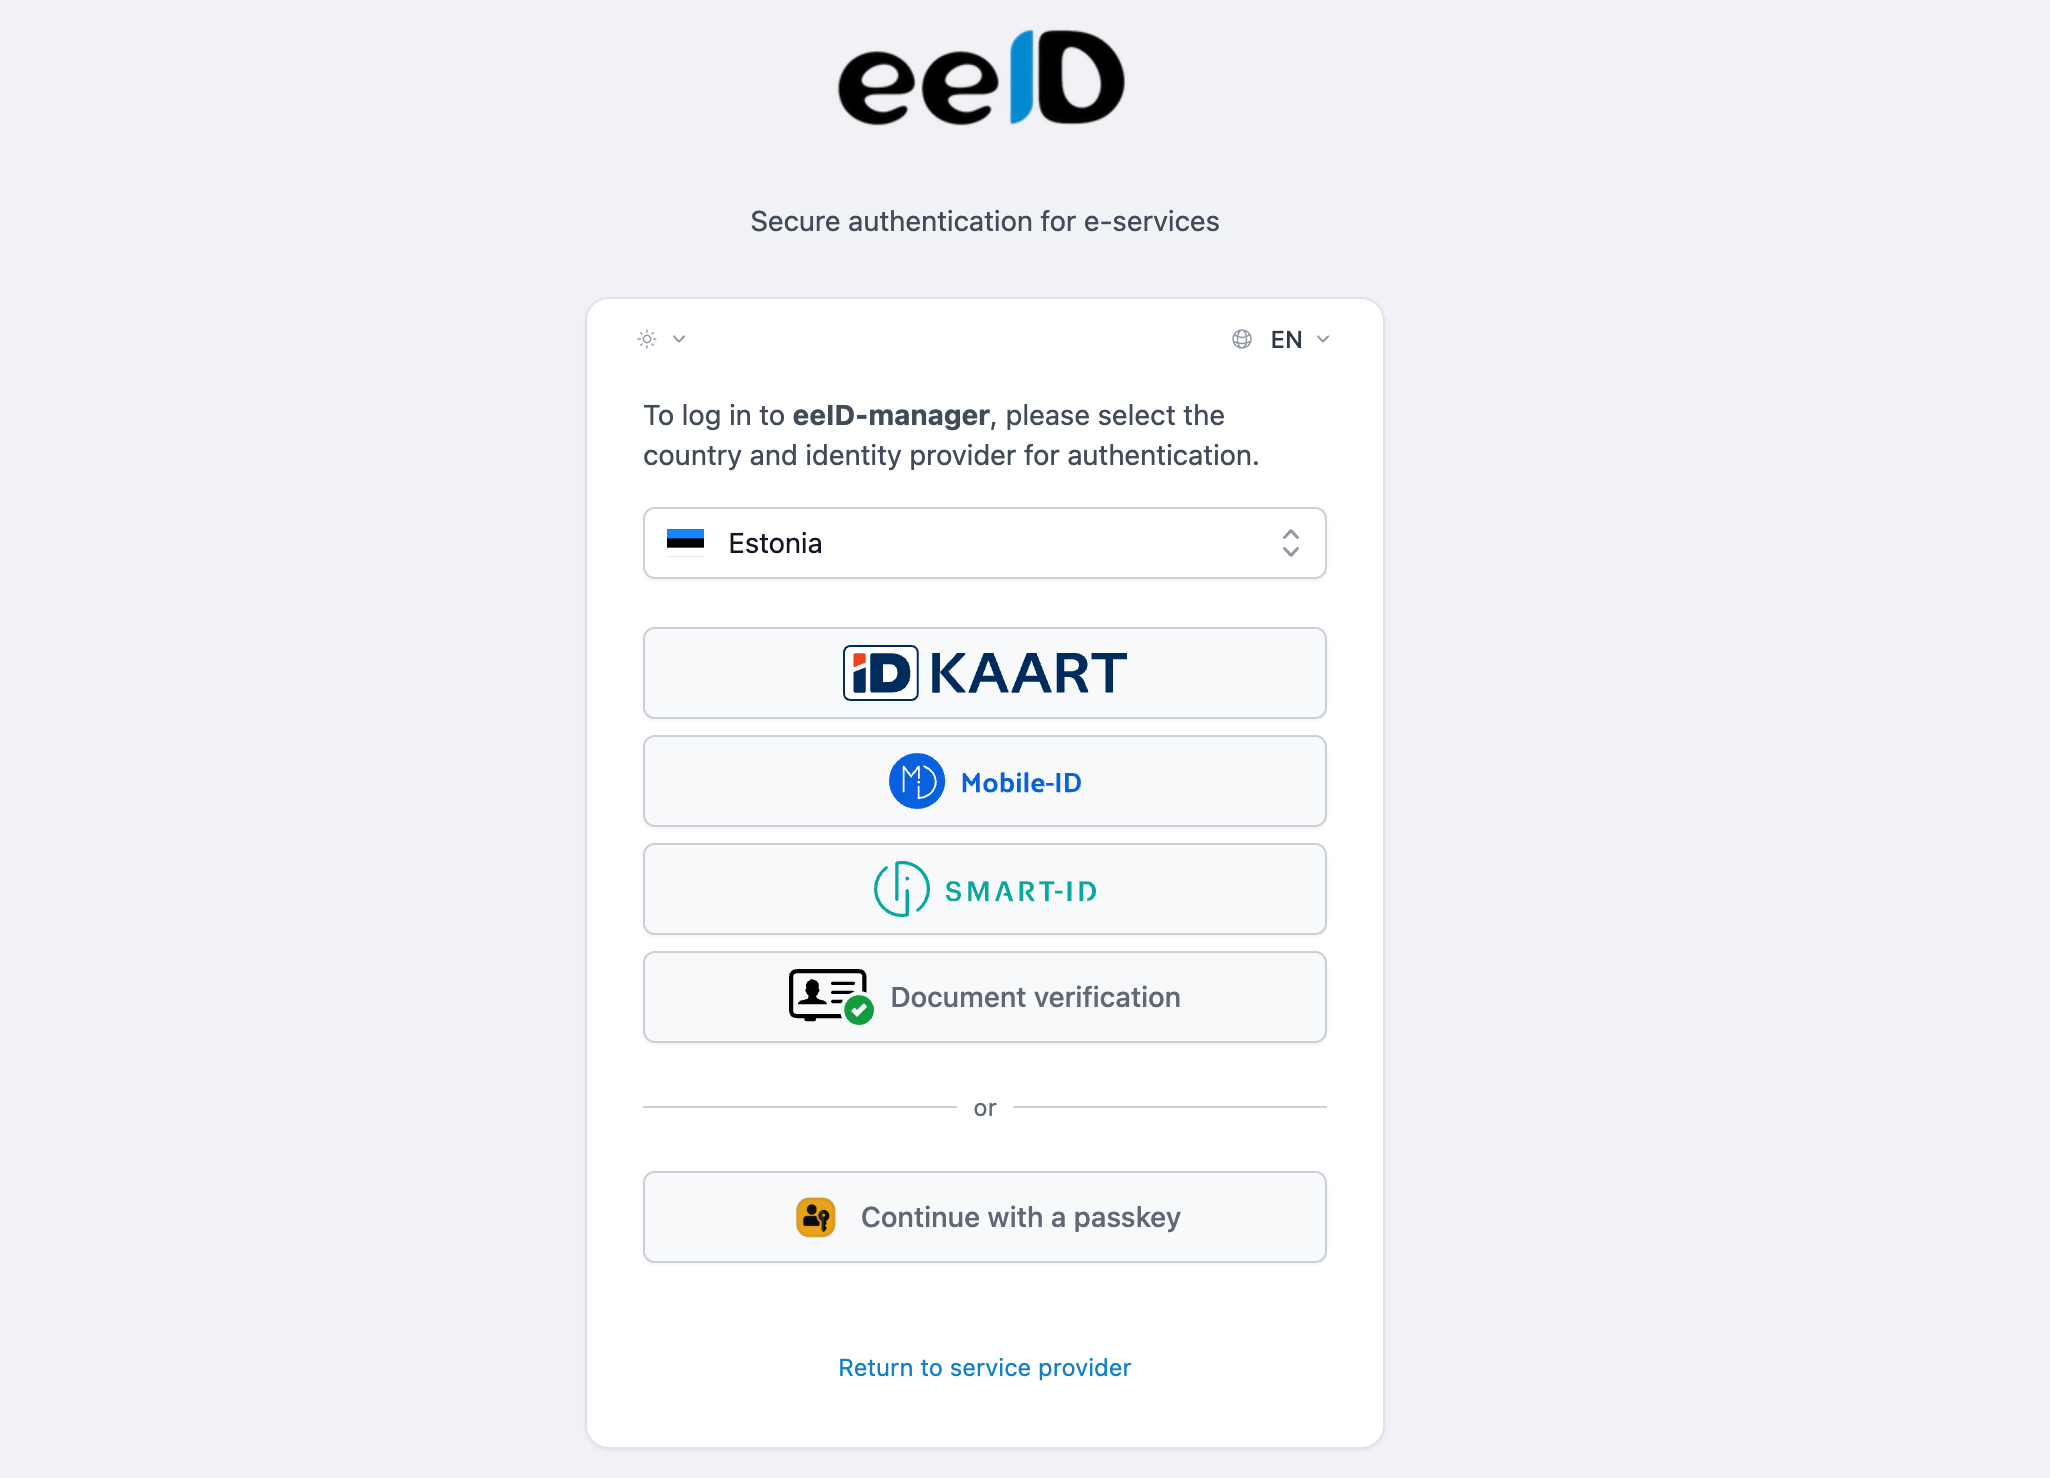
After successful login the page shows details retrieved from the ID token.

You can also navigate to http://localhost:8080/login to directly access the default login page created by Spring Security.
For further examples and help regarding OAuth2 and Spring Security for a reactive web application visit Spring Security Reference Documentation.
PHP OpenID Connect example
Make sure you configure am authentication service in the eeID manager before getting started.
This example uses the jumbojett basic OpenID Connect client and phpdotenv installed using composer and running on Docker container.
- jumbojett: https://github.com/jumbojett/OpenID-Connect-PHP
- phpdotenv: https://github.com/vlucas/phpdotenv
- composer: https://getcomposer.org/
It takes users to an attributes page after login and display the claims/values that have been passed. In the real world you would read the claims and feed them into your authorisation/user-session management process.
Instructions
- Start by creating a new Dockerfile. This file will be used to build an image for your container. In the Dockerfile, include the following lines::
FROM php:7.4-apache
RUN echo "ServerName localhost" >> /etc/apache2/apache2.conf
RUN apt-get update && apt-get install -y \
    zip \
    unzip
RUN curl -sS https://getcomposer.org/installer | php -- --install-dir=/usr/local/bin --filename=composer
This will use the php:7.4-apache image as the base for your container and install the necessary
dependencies for Composer (zip and unzip). It will then use curl to download the Composer
installer and run it to install Composer in the /usr/local/bin directory.
2. Create docker-compose.yml file in your project folder:
version: '3.1'

services:
  app:
    build:
      context: .
    ports:
      - "8082:80"
    volumes:
      - .:/var/www/html
    environment:
      - APACHE_DOCUMENT_ROOT=/var/www/html
3. Create composer.json
{
    "require": {
        "jumbojett/openid-connect-php": "0.8.0",
        "vlucas/phpdotenv": "^5.3"
    }
}
4. Build the image and run a new container
dockder-compose up --build
5. Run composer to read the composer.json file from the current directory, resolve the dependencies and install them into vendor:
docker-compose run --rm app composer install
6. Create a php page to handle the login, e.g. index.php.
This one creates a session attribute of an array of the returned claims and then passes the user
to an attributes.php page where they can be displayed.
<?php

require 'vendor/autoload.php';

use Jumbojett\OpenIDConnectClient;

$dotenv = \Dotenv\Dotenv::createUnsafeImmutable(__DIR__);
$dotenv->load();

$issuer = getenv('ISSUER');
$cid = getenv('OAUTH_CLIENT_ID');
$secret = getenv('OAUTH_CLIENT_SECRET');
$redirectUrl = getenv('CLIENT_REDIRECT_URI');
$scope = getenv('SCOPE');

$oidc = new OpenIDConnectClient($issuer, $cid, $secret);
$oidc->setRedirectURL($redirectUrl);
$oidc->addScope($scope);
$oidc->addAuthParam(['ui_locales' => 'en']);

$oidc->authenticate();

$profile = $oidc->getVerifiedClaims('profile_attributes');

foreach($profile as $key=>$value) {
    if(is_array($value)){
            $v = implode(', ', $value);
    }else{
            $v = $value;
    }
    $session[$key] = $v;
}


session_start();
$_SESSION['attributes'] = $session;

header("Location: ./attributes.php");

?>
7. Create .env file with your OAuth client configuration parameters
ISSUER="https://test-auth.eeid.ee/hydra-public"
OAUTH_CLIENT_ID="<your-eeid-client-id>"
OAUTH_CLIENT_SECRET="<your-eeid-secret>"
CLIENT_REDIRECT_URI="http://localhost:8082/index.php"
AUTHORIZATION_SERVER_AUTHORIZE_URL="https://test-auth.eeid.ee/hydra-public/oauth2/auth"
AUTHORIZATION_SERVER_ACCESS_TOKEN_URL="https://test-auth.eeid.ee/hydra-public/oauth2/token"
SCOPE="openid"
Parameters like OAUTH_CLIENT_ID, OAUTH_CLIENT_SECRET and SCOPE have been defined after
configuring the service in the eeID manager (see Getting Started).
8. Add the attributes.php page. E.g:
<?php
    session_start();
?>
<!DOCTYPE html>
<html lang="en">

<head>

   <meta charset="utf-8">
   <meta http-equiv="X-UA-Compatible" content="IE=edge">
   <meta name="viewport" content="width=device-width, initial-scale=1">
   <meta name="description" content="">
   <meta name="author" content="">

   <title>OpenID Connect: Released Attributes</title>

</head>

<body>

   <!-- Intro -->
   <div class="banner">
      <div class="container">

         <h3>
            Claims sent back from OpenID Connect
         </h3>
         <br/>
      </div>
   </div>

   <!-- Claims -->
   <div class="content-section-a" id="openAthensClaims">
      <div class="container">
         <div class="row">

               <table class="table" style="width:80%;" border = "1">
                 <?php foreach ($_SESSION['attributes'] as $key=>$value): ?>
                      <tr>
                          <td data-toggle="tooltip" title=<?php echo $key; ?>><?php echo $key; ?></td>
                          <td data-toggle="tooltip" title=<?php echo $value; ?>><?php echo $value; ?></td>
                      </tr>
                 <?php endforeach; ?>

               </table>
         </div>
      </div>
   </div>
</body>

</html>
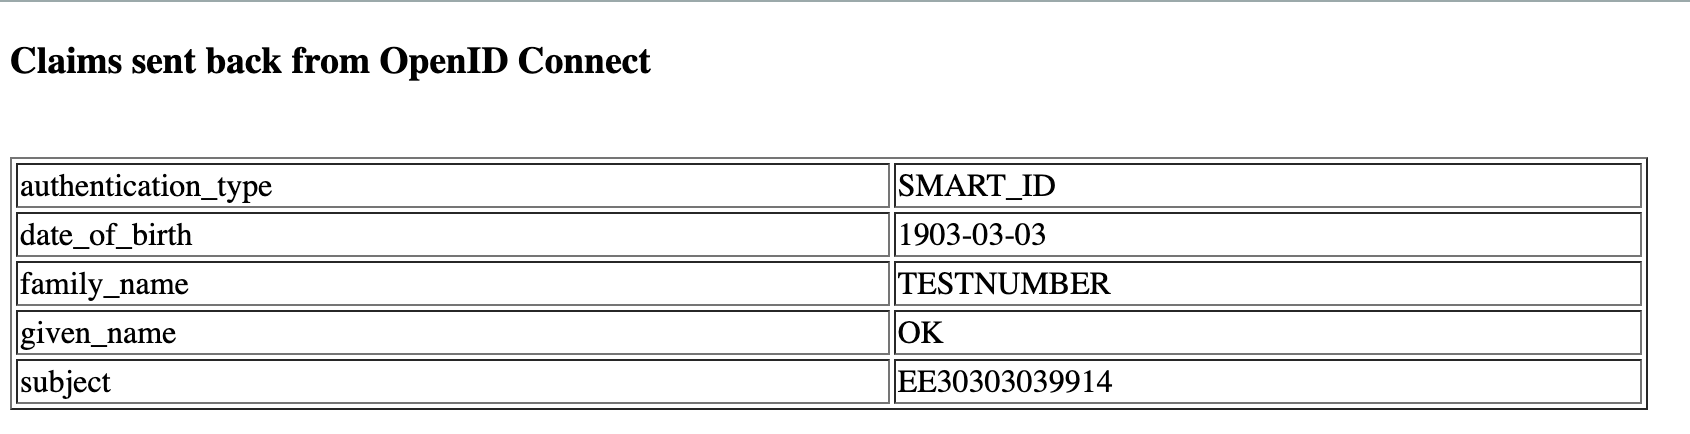
9. Go to http://localhost:8082/index.php in a browser. You will be sent to an eeID sign-in page.
After signing in you will be sent back and then on the attributes page.
Rails on Rails with OmniAuth::OpenIDConnect
In this example, we will make use of OmniAuth::OpenIDConnect gem, which contains the OpenID Connect (OIDC) strategy for OmniAuth library that standardizes multi-provider authentication for web applications.
Getting Started
Start by generating your Rails application with Bootstrap using ESBuild to build both the JavaScript and CSS files. From the terminal, run the command to do so:
rails new eeid_demo -T -j esbuild --css bootstrap
Create a partial named _navigation.html.erb to hold your navigation code. The partial should be located in the app/views/layouts directory. Enter the code below into an IDE. It uses Bootstrap to create a navigation bar for your application.
<nav class="navbar navbar-expand-lg bg-body-tertiary">
  <div class="container-fluid">
    <a class="navbar-brand" href="#">eeID Demo</a>
    <button class="navbar-toggler" type="button" data-bs-toggle="collapse" data-bs-target="#navbarNav" aria-controls="navbarNav" aria-expanded="false" aria-label="Toggle navigation">
      <span class="navbar-toggler-icon"></span>
    </button>
    <div class="collapse navbar-collapse" id="navbarNav">
      <ul class="navbar-nav">
        <li class="nav-item">
          <%= link_to 'Home', root_path, class: 'nav-link active' %>
        </li>
      </ul>
    </div>
  </div>
</nav>
For the navigation to be used, we need to render it in the application layout. Change application layout to look like this:
<!DOCTYPE html>
<html>
  <head>
    <title>eeID Demo</title>
    <meta name="viewport" content="width=device-width,initial-scale=1">
    <%= csrf_meta_tags %>
    <%= csp_meta_tag %>

    <%= stylesheet_link_tag "application", "data-turbo-track": "reload" %>
    <%= javascript_include_tag "application", "data-turbo-track": "reload", defer: true %>
  </head>

  <body>
    <%= render "layouts/navigation" %>
    <% flash.each do |key, value| %>
      <div class="<%= flash_class(key) %>">
        <%= value %>
      </div>
    <% end %>
    <div class="container-fluid">
      <%= yield %>
    </div>
  </body>
</html>
In order to display flash messages with the Bootstrap alert styles, extend application_helper.rb with the following method:
def flash_class(level)
  flash_classes = {
    notice: 'alert alert-info',
    success: 'alert alert-success',
    error: 'alert alert-error',
    alert: 'alert alert-error'
  }

  flash_classes[level.to_sym]
end
Generate a PagesController with an index action by entering the command below into your terminal.
rails generate controller Pages index
In the index view generated, edit it to look like this:
<div class="jumbotron">
  <h1>Welcome to eeID Demo!</h1>
</div>
Open routes file to add our root_path:
# config/routes.rb

Rails.application.routes.draw do
  root to: 'pages#index'
end
Setting Up OmniAuth Openid Connect
We need to create a new eeID authenitcation service application. Go to eeID manager to create one. Enter all the necessary details:
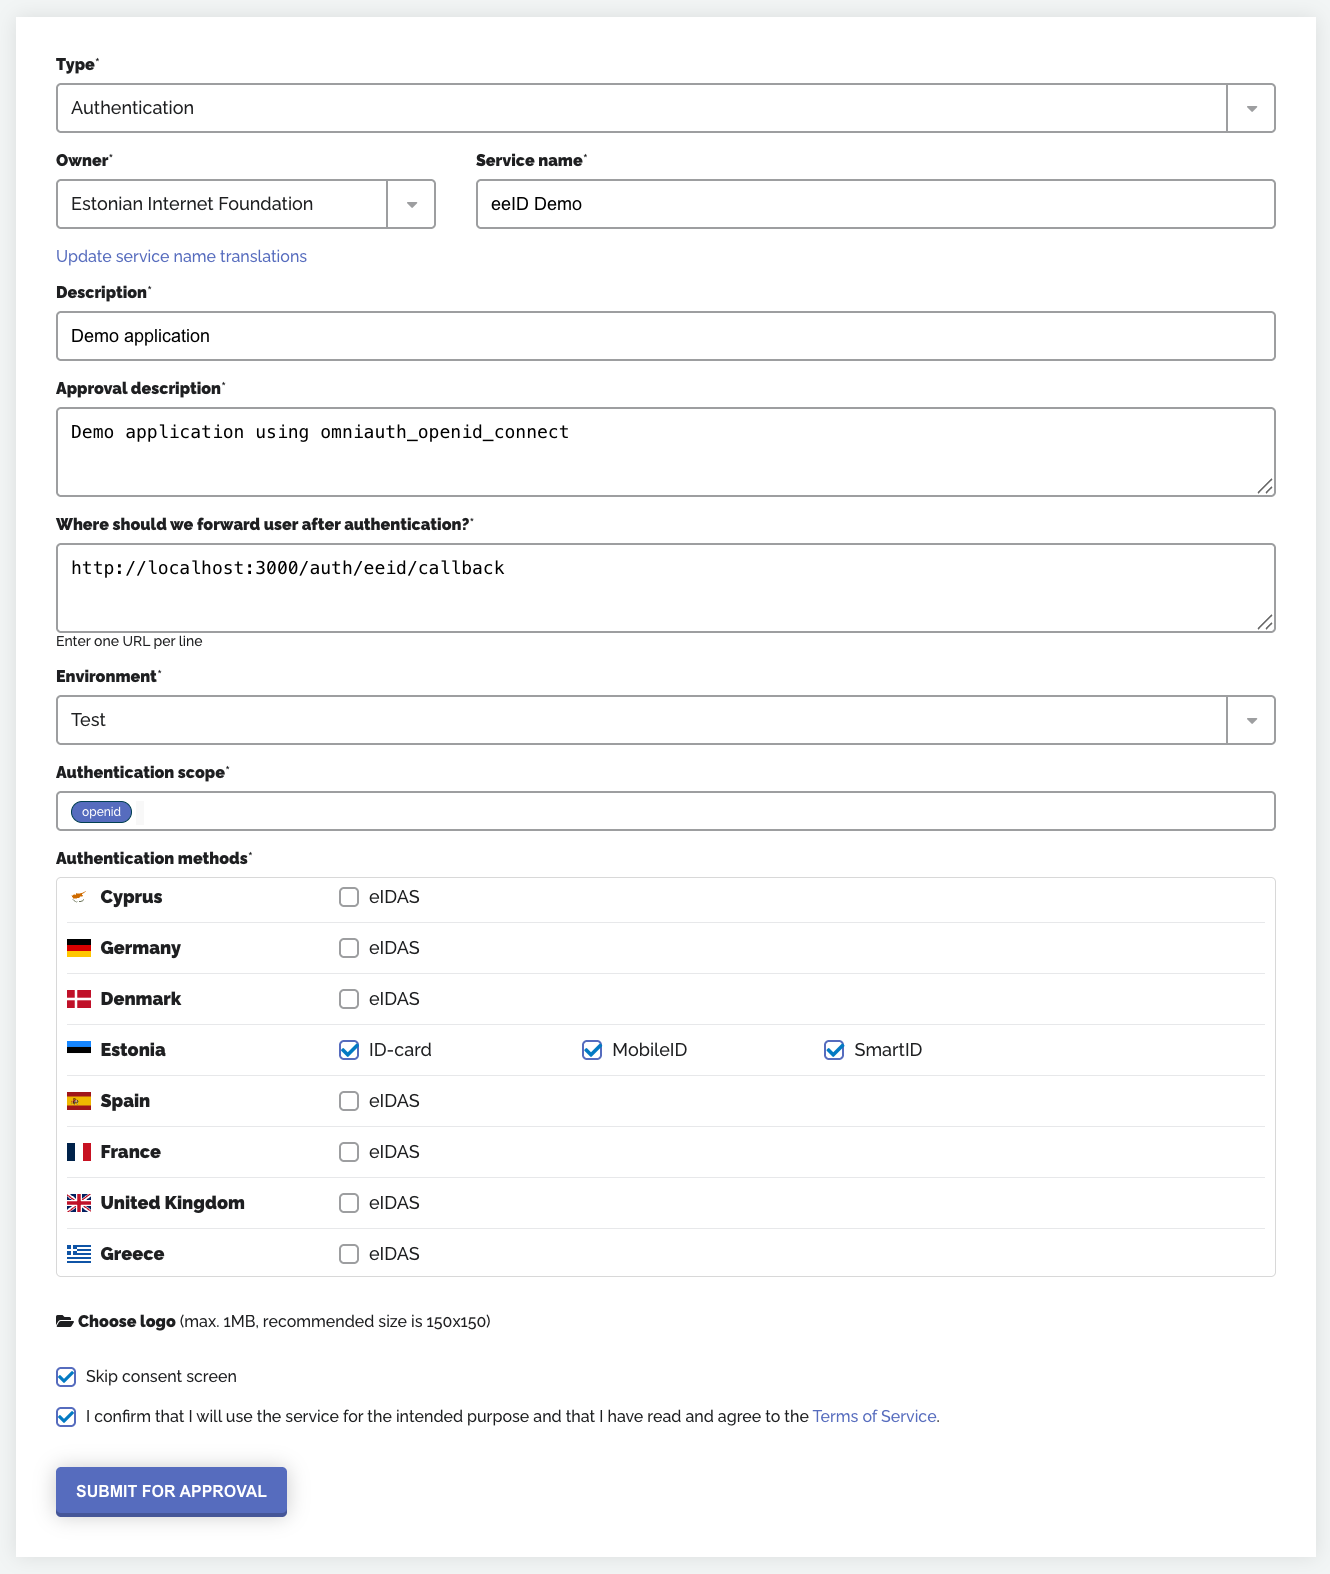
For the callback URL, enter your website's address plus auth/eeid/callback. If you happen to be on a local machine, your callback URL should be this: http://127.0.0.1:3000/auth/eeid/callback
After submitting you will be redirected to the service information page. Copy the Client ID and Client Secret and paste them in a safe place — we will make use of them shortly.
The callback URL is the URL where a user will be redirected to inside the app after successful authentication and approved authorization (the request will also contain the user’s token). All OmniAuth strategies expect the callback URL to equal /auth/:provider/callback. :provider takes the name of the strategy. In our case, the strategy will be eeid as you will list in the initializer.
Open up Gemfile to add the necessary gems:
# Gemfile
...
gem 'omniauth', '>=2.0.0'
gem 'omniauth_openid_connect'
gem 'omniauth-rails_csrf_protection'
Now create an initializer for OmniAuth in your config/initializers directory. This will hold the configuration for OmniAuth:
# config/initializers/omniauth.rb

# Block GET requests to avoid exposing self to CVE-2015-9284
OmniAuth.config.allowed_request_methods = [:post]

Rails.application.config.middleware.use OmniAuth::Builder do
  provider :openid_connect, {
    name: :eeid,
    scope: ENV['SCOPES'].split(','),
    state: SecureRandom.hex(10),
    client_signing_alg: :RS256,
    send_scope_to_token_endpoint: false,
    send_nonce: true,
    issuer: ENV['ISSUER'],
    discovery: true,

    client_options: {
      identifier: ENV['IDENTIFIER'],
      secret: ENV['SECRET'],
      redirect_uri: ENV['REDIRECT_URL'],
    },
  }
end
We need to keep all the necesary private data safe as we do not want to push them to a public repository when we commit our code. We will make use of a special gem for this. Open Gemfile again and add the gem below. Add it to Gemfile like so:
# Gemfile
...
group :development, :test do
  ...
  gem 'dotenv-rails'
...
To install the gems, run:
bundle install
In the home directory create a file called .env.
# .env

ISSUER="https://test-auth.eeid.ee/hydra-public"
IDENTIFIER="<your-eeid-client-id>"
SECRET="<your-eeid-secret>"
REDIRECT_URL="http://localhost:3000/auth/eeid/callback"
SCOPES="openid"
Open .gitignore and add the file we just created.
# .gitignore
...
# Ignore .env used for storing id and secret
.env
Time to work on our routes. Open up the routes file and add the route below:
# config/routes.rb

Rails.application.routes.draw do
  ...
  get '/auth/:provider/callback', to: 'sessions#create'
  ...
end
We need to add the link for eeID sign-in to navigation and to show this link only when the user is not signed in. Open navigation file and change it to look like this:
<nav class="navbar navbar-expand-lg bg-body-tertiary">
  <div class="container-fluid">
    <a class="navbar-brand" href="#">eeID Demo</a>
    <button class="navbar-toggler" type="button" data-bs-toggle="collapse" data-bs-target="#navbarNav" aria-controls="navbarNav" aria-expanded="false" aria-label="Toggle navigation">
      <span class="navbar-toggler-icon"></span>
    </button>
    <div class="collapse navbar-collapse" id="navbarNav">
      <ul class="navbar-nav">
        <li class="nav-item">
          <%= link_to 'Home', root_path, class: 'nav-link active' %>
        </li>
        <% if current_user %>
          <li class="nav-item nav-link">Signed in as <%= current_user.first_name %></li>
        <% else %>
          <li class="nav-item"><%= button_to 'Sign in with eeID', '/auth/eeid', class: 'nav-link', data: { turbo: false } %></li>
        <% end %>
      </ul>
    </div>
  </div>
</nav>
Creating Sessions
We'll need a session controller to handle the logging in of users. Create a file for that in controllers directory. The create action helps create a session for users so they can be logged into your application. Without this, users have no means of logging in.
# app/controllers/sessions_controller.rb

class SessionsController < ApplicationController
  def create
    @user = User.find_or_create_from_auth_hash(auth_hash)
    session[:user_id] = @user.id
    flash[:success] = 'Sucessfully logged in!'
    redirect_to root_path
  end

  protected

  def auth_hash
    request.env['omniauth.auth']
  end
end
We'll need a current_user method at this point. This will help us check if a user is logged in or out.
Open app/controllers/application_controller.rb and add the following:
# app/controllers/application_controller.rb

class ApplicationController < ActionController::Base
  ...
  def current_user
    @current_user ||= User.find(session[:user_id]) if session[:user_id]
  end

  helper_method :current_user
  ...
end
User Model
Now generate a model for Users. Run this command to do so:
rails generate model User provider:string uid:string first_name:string last_name:string token:string
That should generate a migration file that looks like this:
class CreateUsers < ActiveRecord::Migration[7.0]
  def change
    create_table :users do |t|
      t.string :provider
      t.string :uid
      t.string :first_name
      t.string :last_name
      t.string :token

      t.timestamps
    end
  end
end
Now migrate database by running:
rake db:migrate
Open up User model and make it look like this:
# app/models/user.rb

class User < ApplicationRecord
  def self.find_or_create_from_auth_hash(auth_hash)
    user = where(provider: auth_hash.provider, uid: auth_hash.uid).first_or_create
    user.update(
      first_name: auth_hash.info.first_name,
      last_name: auth_hash.info.last_name,
      token: auth_hash.credentials.token,
    )
    user
  end
end
The code above stores some information belonging to the user. This includes the first_name, last_name and token of the user.
Deleting Sessions
In our application, we want to provide users the ability to log out. We will need a destroy action in SessionsController for this to work. Then a link will be added to navigation.
Add the destroy action to SessionsController:
# app/controllers/sessions_controller.rb

class SessionsController < ApplicationController
  ...
  def destroy
    if current_user
      session.delete(:user_id)
      flash[:success] = "Sucessfully logged out!"
    end
    redirect_to root_path
  end
  ...
end
Then add this link for logging out to navigation, so our navigation looks like this:
<nav class="navbar navbar-expand-lg bg-body-tertiary">
  <div class="container-fluid">
    <a class="navbar-brand" href="#">eeID Demo</a>
    <button class="navbar-toggler" type="button" data-bs-toggle="collapse" data-bs-target="#navbarNav" aria-controls="navbarNav" aria-expanded="false" aria-label="Toggle navigation">
      <span class="navbar-toggler-icon"></span>
    </button>
    <div class="collapse navbar-collapse" id="navbarNav">
      <ul class="navbar-nav">
        <li class="nav-item">
          <%= link_to 'Home', root_path, class: 'nav-link active' %>
        </li>
        <% if current_user %>
          <li class="nav-item nav-link">Signed in as <%= current_user.first_name %></li>
          <li class="nav-item"><%= button_to 'Log Out', logout_path, method: :delete, class: 'nav-link', data: { turbo: false } %></li>
        <% else %>
          <li class="nav-item"><%= button_to 'Sign in with eeID', '/auth/eeid', class: 'nav-link', data: { turbo: false } %></li>
        <% end %>
      </ul>
    </div>
  </div>
</nav>
Open up config/routes.rb to update our routes with the action we just created.
Rails.application.routes.draw do
  ...
  delete '/logout', to: 'sessions#destroy'
  ...
end
Start up rails server and point browser to http://localhost:3000.
bin/dev
Embedded sign-in
The embedded sign-in form (the eeID widget) runs the authentication inside an iframe on your own page, instead of redirecting the user to eeID and back. The user never leaves your site.
Everything else stays the same: the same service, the same client credentials, the same scopes and the same ID token. Only the beginning of the flow differs — instead of sending the browser to the authentication request URL, your backend asks eeID for a session and your page frames it.
The authorization code never reaches the browser. Your backend creates the session with your
client credentials, the widget hands your page a single-use result_token, and your backend
exchanges that token for the code. A user with developer tools open sees nothing they can replay.
A complete, runnable integration in PHP is published at github.com/internetee/eeid_php_embedded_demo.
Should you use it?
Use the embedded form when you want the sign-in to feel part of your own page, and you have a backend that can hold a client secret.
Keep the classic redirect flow when your client is public (a single-page app or a mobile application using PKCE), or when you cannot run the two server-side calls the embedded form requires. The embedded form is not available to public clients: creating a session requires your client secret.
Both flows can be enabled on the same service at the same time.
Requirements
- A registered and approved
Authenticationservice — see Creating a new service - Its
Client IDandSecret, used from your backend only - Embedded mode enabled on the service, with your page's origin allowlisted (below)
Enabling embedded mode
In eeID manager, open your service and edit it:
- Tick Enable embedded widget.
- In Embedded widget allowed origins, add every origin that will frame the widget, one per
line — for example
https://www.example.com. - Save.
Only the listed origins may frame the widget or receive its messages. A page served from any other origin is refused by the browser, and session creation is rejected.
An origin is a scheme, a host and an optional port — nothing else:
https://www.example.com— correcthttps://www.example.com:8443— correcthttps://www.example.com/signin— rejected, a path is not part of an originhttps://*.example.com— rejected, wildcards cannot be used to address a browser window
http:// is accepted only for local development origins such as http://localhost:8081.
How it works
Four steps. Two of them are server-to-server calls from your backend, one is the widget in your page, and the last is the ordinary OAuth2 token request you already make today.
- Your backend calls
POST /api/embedded/sessionswith your client credentials and receives asession_token. - Your page loads the widget script and renders
<eeid-widget>with that token. The user picks a method and authenticates inside the iframe. - The widget tells your page it succeeded, handing over a single-use
result_token. - Your backend calls
POST /api/embedded/sessions/{result_token}/redeemto obtain the OAuth2code, then exchanges it at the identity token request exactly as in the redirect flow.
The browser never talks to the OAuth2 server: eeID performs the authorization request and the login/consent steps server-side. That is what allows the flow to work when third-party cookies are blocked.
Creating a session
Create a session
curl -X POST https://auth.eeid.ee/api/embedded/sessions \
  -u "$EEID_CLIENT_ID:$EEID_CLIENT_SECRET" \
  -H "Content-Type: application/json" \
  -d '{
        "redirect_uri": "https://www.example.com/auth/callback",
        "scope": "openid",
        "state": "f3b2c3e7f4cf0bed3a783ed6ece617e3",
        "nonce": "9a1f4b0c2d8e6f37",
        "locale": "en",
        "return_url": "https://www.example.com/signin"
      }'
Response
{
  "session_token": "gW7s8x1Qm2...",
  "expires_in": 600,
  "allowed_methods": null,
  "locales": ["en", "et", "ru"]
}
URL: POST https://auth.eeid.ee/api/embedded/sessions
Authentication: HTTP Basic, with your Client ID as the user name and your Secret as the
password. This call must be made from your backend. Never expose the secret to a browser.
Required parameters:
redirect_uri- one of the redirection URLs registered on the service. The browser is not sent there in the embedded flow, but a real authorization request is started with it and the same value is presented again at the token request, so it must match exactly.
Optional parameters:
scope- authentication scope, defaults toopenid. Must correspond to the scope selected for the service. See Authentication scopestate- security code against false request attacks. It is returned to you by the redeem call, where you verify it. See Protectionnonce- unique parameter which helps to prevent replay attacks. Verify it in the ID tokenlocale- user interface language:et,enorru.ui_localesis accepted as an aliasreturn_url- the page hosting the widget. Required for the authentication methods that must leave the iframe — see Methods that leave the frame. Its origin must be on the service's allowlisttheme- a JSON object styling the widget, see Theming
Response fields:
session_token- the opaque token the widget is mounted with. It is not a credential of yours and is safe to render into the page: it works only from an allowlisted originexpires_in- seconds the session remains valid (600 by default). Create a session when the user is about to sign in, not on every page renderallowed_methods- the authentication methods the widget will offer, ornullfor all methods configured on the servicelocales- the languages the widget supports
Embedding the widget
Load the SDK and mount the widget
<script src="https://auth.eeid.ee/widget/eeid-widget.js"></script>

<eeid-widget
  base-url="https://auth.eeid.ee"
  session-token="gW7s8x1Qm2..."
  height="420px"></eeid-widget>
React to the outcome
const widget = document.querySelector("eeid-widget")

widget.addEventListener("eeid:success", async (event) => {
  widget.remove()                       // required, see the note below

  await fetch("/signin", {
    method: "POST",
    headers: { "Content-Type": "application/json" },
    body: JSON.stringify({ result_token: event.detail.resultToken })
  })

  location.reload()
})

widget.addEventListener("eeid:error",  (e) => showError(e.detail.error))
widget.addEventListener("eeid:cancel", ()  => showChooserAgain())
The SDK is served by eeID itself — there is nothing to install and no build step. It defines one custom element that frames the sign-in form, delegates the browser permissions the framed methods need, tracks the iframe height, and re-emits the widget's messages as ordinary DOM events.
Attributes of <eeid-widget>:
base-url(required) -https://auth.eeid.ee, orhttps://test-auth.eeid.eefor a service in theTestenvironmentsession-token(required) - the token from the create callheight- initial height, for example420px. The widget resizes itself afterwardstheme- a JSON theme, applied without creating a new sessiontitle- accessible title of the iframe
Method:
setTheme(partial)- merges and applies a theme at runtime, for example when your page switches to dark mode
Events, dispatched on the element with their data in detail:
eeid:ready- the form is loadedeeid:resize- the content height changed; the SDK has already applied iteeid:success- authentication finished.detail.resultTokenis the single-use token to redeem,detail.stateis thestateyou suppliedeeid:error- authentication failed.detail.erroranddetail.errorDescriptioncarry the OAuth2 erroreeid:cancel- the user cancelledeeid:expand/eeid:collapse- a method asked for the whole viewport (identity verification does this). The SDK handles it; listen only if your own layout needs to react
Redeeming the result
Redeem the result token, then exchange the code
curl -X POST https://auth.eeid.ee/api/embedded/sessions/$RESULT_TOKEN/redeem \
  -u "$EEID_CLIENT_ID:$EEID_CLIENT_SECRET"
Response
{
  "code": "71ed5797c3d957817d31",
  "state": "f3b2c3e7f4cf0bed3a783ed6ece617e3"
}
URL: POST https://auth.eeid.ee/api/embedded/sessions/{result_token}/redeem
Authenticated with the same client credentials as the create call, and made from your backend.
The result token is single-use and bound to your client: the first valid call returns the code
and destroys the session. A replay, an expired token, or a token belonging to another client is
answered with 410 Gone and nothing else — an attacker who intercepts a result token cannot learn
whether it ever existed.
Verify that the returned state matches the one you sent, then exchange the code with an
identity token request, using the same redirect_uri you used when creating the session.
From that point the flow is identical to the redirect flow, including verification of the ID
token and its nonce.
Methods that leave the frame
Smart-ID+ and the cross-border methods (eIDAS, eParaksts, Freja, MojeID) cannot complete inside an iframe: a mobile app link is only honoured from a top-level navigation, and a foreign identity provider refuses to be framed. For those methods the widget takes over the whole window and then returns to your page.
That is what return_url is for. Pass the URL of the page hosting the widget when you create the
session. When the user comes back, that URL carries a query parameter:
Resuming after a method that left the frame
<?php
$sessionToken = $_GET['eeid_session_token'] ?? null;

if ($sessionToken === null) {
    $sessionToken = create_session()['session_token'];
}
// mount <eeid-widget> with $sessionToken as usual
Mount the widget with that token and the flow finishes normally through eeid:success. Strip the
parameter from the address bar as you consume it — it is single-use, so a reload would otherwise
try to resume a session that is already spent.
If you omit return_url, those methods fall back to a plain top-level redirect to your
redirect_uri?code=…, exactly like the classic redirect flow.
Theming
A theme covering most needs
{
  "preset": "light",
  "colorScheme": "system",
  "color": { "primary": "#0B5FFF", "onPrimary": "#FFFFFF" },
  "typography": { "fontFamily": "\"Inter\", system-ui, sans-serif" },
  "shape": { "radiusButton": "8px" },
  "branding": { "showFooter": false }
}
The widget is styled with a JSON theme, supplied either as the theme parameter when creating the
session, as the theme attribute on the element, or at runtime with setTheme() — for example
when your page switches to dark mode.
The main groups are preset, colorScheme (light, dark, system), density
(comfortable, compact), color, typography, shape, spacing, components, layout,
branding and messages. Unknown keys are rejected rather than ignored, so a typo is reported
when the session is created instead of silently doing nothing.
Note that the first screen the user sees — the list of authentication methods — takes its colours
from components.methodList, not from color.primary, which paints buttons. Changing only the
primary colour therefore looks like nothing happened until a method is selected.
For a stylesheet of your own, advanced.themeCssUrl loads one extra CSS file inside the widget.
It must be served from an origin that is already on the service's allowlist.
Errors
| Status | Meaning |
|---|---|
400 Bad Request |
A parameter is invalid, for example a return_url whose origin is not allowlisted |
401 Unauthorized |
The client id or secret is wrong, or the service belongs to a different environment |
403 Forbidden |
Embedded mode is not enabled for this client, or no valid origin is allowlisted |
410 Gone |
The result token is invalid, already redeemed, or expired |
422 Unprocessable Entity |
The theme did not validate, or a required parameter is missing |
429 Too Many Requests |
Rate limited, see below. Retry-After gives the seconds to wait |
502 Bad Gateway |
eeID could not reach its authorization server. Retry later |
Errors that happen during authentication reach your page as an eeid:error event rather than as
a status code — the session was created successfully, the authentication itself failed.
Rate limits
The embedded API is rate limited per client and per source address. The limits are set well above normal traffic and exist to stop credential guessing: failed authentications are counted far more strictly than ordinary calls, and a successful call clears that count.
If you receive 429 Too Many Requests, wait the number of seconds given in the Retry-After
header before retrying. Repeated 401s from a misconfigured secret are the usual way to reach it,
so fix the credentials rather than retrying in a loop.
Test environment
A service in the Test environment uses https://test-auth.eeid.ee for all three URLs — the
session API, the widget script and the base-url attribute — and the matching token endpoint.
Test authentications are free. A service exists in exactly one environment at a time, so use the
host that matches the service your credentials belong to.
Example application
A complete integration, small enough to read in one sitting, is published at github.com/internetee/eeid_php_embedded_demo.
It is a single PHP file plus a <script> tag, and it runs the whole loop: creating the session
server-side, framing the widget, redeeming the result token, exchanging it for the ID token and
displaying the claims. It also demonstrates theming, locale selection, signing out and signing in
again, and the resume path for the methods that leave the frame.
git clone https://github.com/internetee/eeid_php_embedded_demo.git
cd eeid_php_embedded_demo
cp .env.example .env      # fill in EEID_CLIENT_ID and EEID_CLIENT_SECRET
docker compose up --build
Then open http://localhost:8081. Remember to add http://localhost:8081
to your service's Embedded widget allowed origins first, or the browser will refuse to display
the widget.
eeID Identification
The eeID Identification Service allows organizations to create identification requests and verify user identities based on specific criteria. It is built on a robust framework that ensures security, compliance, and ease of use.
Key Features
- Secure Identity Verification: The service provides a secure method for verifying user identities, ensuring that organizations can trust the information they receive.
- Claims Comparison and Discovery: Provide
claims_requiredwith values to compare the authenticated user against expected data, or use discovery mode (supported claim types with empty values) when you do not know the end-user's details upfront. eeID exposes the comparison outcome viaclaims_matched,mismatched_claims, andclaims_comparison_errors. A completed request always includes the authenticatedresult. - Multiple Delivery Methods: Clients can choose how they receive proof of identity documents, including email (default), API pull, or webhook delivery.
- User-Friendly Interface: The eeID manager offers a no-code solution for clients to create identification requests easily.
- Real-Time Notifications: Clients can receive updates on the status of identification requests through webhooks. The completion webhook fires after successful authentication, regardless of whether claims matched.
Getting Started
To begin using the eeID Identification Service, follow these steps:
- Sign Up: Create an account on the eeID Manager.
- Create a Service:
- Navigate to the
Servicessection in the eeID Manager. - Click on
+ Create New Service, selectIdentificationtype and fill in the required details, see Creating a new service.
- Navigate to the
- Submit the service for approval
Example Workflow
- View Identification Requests:
- Go to the identification service show page. Click the button "View Identification Requests" to see existing requests if any.
- Create a New Request:
- Click the button "Create New Request". A form will appear prompting you to enter the necessary claims:
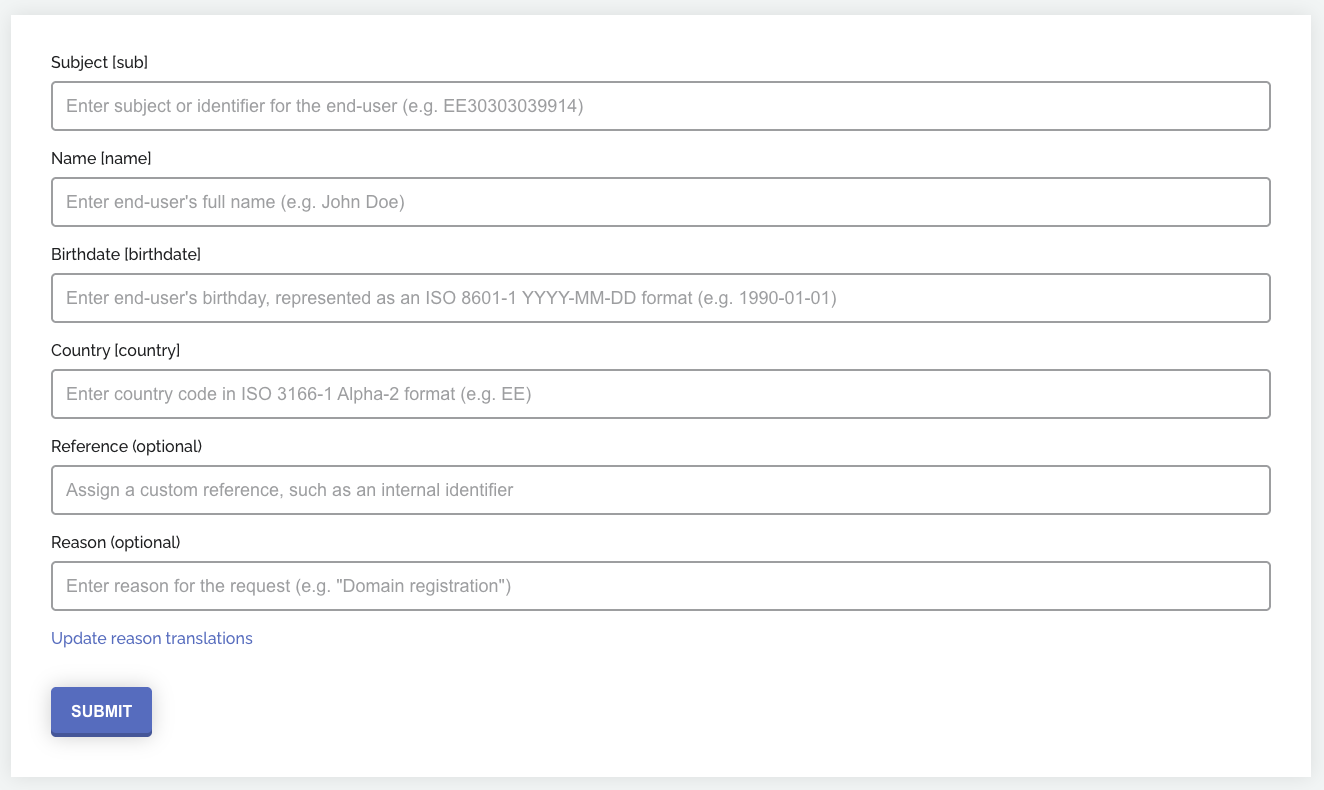
- Click the button "Create New Request". A form will appear prompting you to enter the necessary claims:
Enter Claims (comparison or discovery):
claims_requiredmust contain at least one supported claim type (sub,name,birthdate, orcountry). You can use either comparison mode or discovery mode:- Comparison mode — provide at least one claim with a non-empty value. eeID compares these against the authenticated user's identity and records the outcome, but a mismatch does not block completion:
- sub: The unique identifier (subject) for the end-user. The value can be either the national ID number or the document number, and must start with the two-letter country code (e.g.,
EE12345678901orEEAB1234567). - name: The end-user's full name.
- birthdate: The end-user's date of birth, in YYYY-MM-DD format.
- country: The end-user's country, in ISO 3166-1 Alpha-2 format.
- sub: The unique identifier (subject) for the end-user. The value can be either the national ID number or the document number, and must start with the two-letter country code (e.g.,
- Discovery mode — when you do not know the end-user's details upfront, include one or more supported claim types with empty values (or omit the
valuefield). eeID authenticates the user and returns their identity inresultwithout comparing against expected values.claims_matchedistruebecause no values were provided for comparison. Example:[{"type": "sub", "value": ""}]. - Additionally, enter a reference: This reference serves as an identifier in the system of the calling service and will be included in the result if present.
- Enter identification reason: Provide a clear explanation of why you are requesting identification. This reason will be displayed to the end-user on the identification form, helping them understand the purpose of the identification request. It is recommended to provide a concise and transparent reason to build trust with the end-user.
Submit the Request:
- Once all required data is entered, submit the form to create a new identification request.
- The system generates a new identification request and provides a unique link for the end-user:
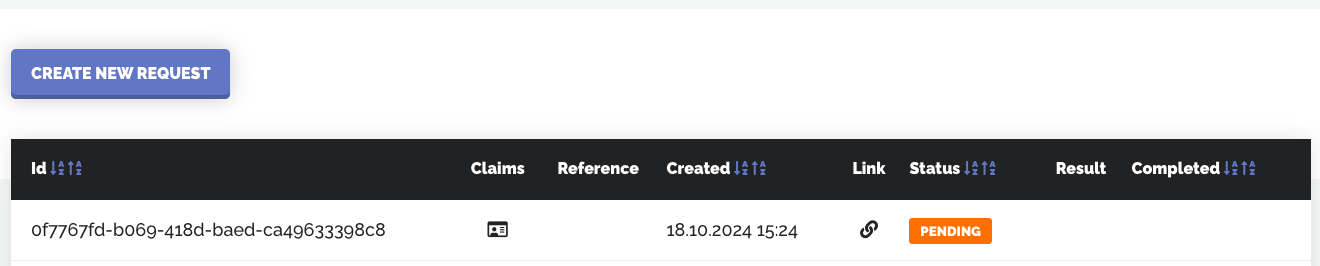
Send the Link to the End-User:
- It is your responsibility to send the generated link to the end-user for verification.
- You can add a
ui_localesparameter to the link in order to change the UI language. The supported languages areru(Russian),et(Estonian), anden(English). For example, to change the UI language to Russian, add?ui_locales=ruto the end of the link. - You can also add a
countryparameter to preselect the country on the eeID authentication page. Use an ISO 3166-1 alpha-2 country code, for exampleEE,LV,LT,SE. If you need to use both parameters, append them together, for example?ui_locales=et&country=LV.
Verification Process:
- The end-user follows the link to complete the verification process with eeID.
- The identification request is marked as completed once the end-user successfully authenticates. Completed means authentication succeeded, not necessarily that all claims matched. Check
claims_matchedon the request (via the API or eeID manager) to see whether the authenticated data matched your expectations. - The end-user sees a success message when authentication succeeds, even if claims did not match.
- An email will be sent to the identification service contact email. If a secure webhook URL was provided, the service will send a POST request once the proof of identity document is ready. Both the email and webhook are sent for matched and mismatched requests alike.
Handling Aborted and Mismatched Requests:
- If the end-user aborts the flow before authenticating, the status of the identification request remains pending. The end-user can follow the link again to complete authentication at a later time.
- After the first successful authentication, the identification link expires — the end-user cannot use the same link to retry, including to "fix" a claims mismatch.
- If claims did not match, your service should review the authenticated
resultand proof of identity, then approve, reject, or send a new identification request as your business rules require. - The generated link is valid for 7 days while the request is still pending. If authentication is not completed within this time frame, the identification request will expire.
Claims comparison and business match
eeID separates authentication (did the user prove their identity?) from business match (does the authenticated data match what you expected?).
| Outcome | Request status | End-user experience | POI / webhook | Your next step |
|---|---|---|---|---|
| Discovery mode (no claim values provided) | completed, claims_matched: true |
Success | Delivered | Use result to identify the authenticated user |
| Authentication succeeded, claims matched | completed, claims_matched: true |
Success | Delivered | Auto-approve or apply your own checks |
| Authentication succeeded, claims mismatched | completed, claims_matched: false |
Success | Delivered | Review result, mismatched_claims, and POI; approve, reject, or send a new request |
| Authentication not completed | pending |
Can retry via the same link (within 7 days) | Not sent | Wait for the user or expire the request |
| Authentication failed (policy, technical error) | pending or error |
Failure shown to user | Not sent | Investigate or send a new request |
When retrieving a completed identification request via the API, the following fields describe the comparison outcome:
claims_matched(true/false) — whether all non-blank required claims matched.truein discovery mode (no values to compare) as well as when all provided values matched.mismatched_claims— per-claim expected vs actual values whenclaims_matchedisfalse.claims_comparison_errors— human-readable comparison messages.result— the authenticated user's identity data (always present on completed requests).
Identification Requests API
In addition to the no-code solution provided by the eeID manager, the eeID Identification Service offers a robust API for handling identification requests. This API allows developers to programmatically create, manage, and retrieve identification requests, providing greater flexibility and integration capabilities for applications.
API Features
- Create Identification Requests: Easily submit new identification requests by providing the necessary claims, including the subject identifier (
sub), full name (name),countryorbirthdate. This allows for automated request creation directly from your application. - Retrieve Identification Requests: Access existing identification requests to check their status, comparison outcome (
claims_matched,mismatched_claims,claims_comparison_errors), or retrieve detailed information including the authenticatedresult. This feature enables applications to monitor the progress of requests and respond accordingly. - Proof of Identity Request: Retrieve the proof of identity document in PDF format for a specific identification request. This feature is essential for applications that require access to verified identity documents for further processing or record-keeping.
- Authorization: The requests must be authenticated using a valid access token. Ensure that the token is included in the request header as follows:
Authorization: Bearer {access_token}
API Documentation
Comprehensive API documentation is available for the eeID Identification Service. You can access it here: eeID Identification Service API Documentation.
For additional testing, the API is also available in Postman. You can explore the available endpoints, request parameters, and response formats directly in the Postman collection:
eeID Signing
The signing service produces a qualified electronic signature on a document, using the same methods your users already authenticate with. What comes out is an ASiC-E container — the format DigiDoc4 opens, SiVa validates, and an Estonian counterparty expects.
A qualified signature is legally equivalent to a handwritten one across the EU (eIDAS Art. 25). Only methods that put the signing key under the signer's sole control can produce one, which is why signing is offered with Smart-ID, Mobile-ID and the ID card, and not with every method eeID can authenticate.
Your backend creates a signing and sends the signer to a page eeID hosts, or drives its own interface and uses eeID only to build the container. Either way you authenticate with the client credentials you already have — there is no separate token step.
Should you use it?
Use the hosted page when you want signing to work without building one: eeID shows the document, takes the explicit confirmation that makes the signature mean anything, walks the signer through their method, and hands you back a finished container.
Use the headless endpoints when you have your own signing interface, or when you cannot send a customer's document to a third party at all. In hash-only mode you send digests instead of files, and eeID never receives the document.
Both are the same API and the same signing, and a service may use either at any time.
Requirements
- A registered and approved service — see Creating a new service
- Its
Client IDandSecret, used from your backend only - Signing enabled on the service, with the redirect addresses you will use registered
- At least one of Smart-ID, Mobile-ID or the ID card among the service's authentication methods — signing methods are taken from that list, so a service that does not offer Smart-ID cannot sign with it
Enabling signing
In eeID manager, open your service and edit it:
- Tick Enable signing.
- In Signing redirect URIs, add every address a signer may be returned to, one per line.
- Tick Allow several signatures on one document only if you need it — see below.
- Save.
A redirect_uri that is not on that list is refused when you create a signing. The list is
compared exactly — a prefix is not a match, which is what stops a registered address being used
to reach somewhere else.
Several signatures on one document is off unless you ask for it. Without it,
container is refused with 403. It is a separate
switch because a document that collects signatures from several people raises a question eeID
cannot yet answer: a signer's identity code sits inside their signature, which shares a container
with everyone else's, so one person asking to be erased cannot be fully honoured without
destroying the other signers' only proof that they signed. A service signing with one signer is
not exposed to that and does not have to wait for it to be settled.
How it works
Four steps, and only the second one involves a browser.
- Your backend calls
POST /api/signing/sessionswith the document, and receives asigning_uuidand asign_url. - You send the signer to
sign_url. eeID shows them the document, asks them to confirm it, and takes them through their signing method. - eeID tells your server what happened — through your
postback_url, or when you askGET /api/signing/sessions/{signing_uuid}. - You collect the container from
GET /api/signing/sessions/{signing_uuid}/container.
Keep the signing_uuid. It is your handle on the signing and it outlives the signer's
session. The session_token inside sign_url is the signer's capability: it opens the signing
page and the signed document, it expires with their session, and it should not appear in your
logs or your URLs.
API reference
The whole surface. Every endpoint is authenticated with HTTP Basic using your OAuth2 client
credentials, takes and returns JSON unless noted, and is scoped to your own service — a
signing_uuid belonging to another service answers not found.
| Endpoint | What it does | |
|---|---|---|
| POST | /api/signing/sessions |
Creates a signing. Documents as bytes or digests, or a container to add a signature to. Answers signing_uuid, session_token, sign_url |
| GET | /api/signing/sessions/{id} |
What happened to it — status, signatures, container_hash, erased_at |
| GET | /api/signing/sessions/{id}/container |
The signed ASiC-E. In hash-only ingest, the hashcode container to merge into. Not JSON |
| DELETE | /api/signing/sessions/{id} |
Purges the content — documents and container; who signed stays. signer_id_code or erase_signers erases instead. Cannot be undone |
| POST | /api/signing/sessions/{id}/prepare |
Headless: send the certificate, receive the digest to sign |
| POST | /api/signing/sessions/{id}/sign |
Headless: send the signature value, receive the container |
| POST | your postback_url |
What eeID sends you: signer_signed, signing_completed, signing_failed |
{id} is always the signing_uuid from the create response, never the session_token.
Two things this table cannot show, and both catch people out: there is no signing_method
parameter on create — the service's configuration and the signer decide (why)
— and the browser-facing sign_url is not part of this API. Your backend never calls it; the
signer's browser does.
Creating a signing
Create a signing
curl -X POST https://auth.eeid.ee/api/signing/sessions \
  -u "$EEID_CLIENT_ID:$EEID_CLIENT_SECRET" \
  -H "Content-Type: application/json" \
  -d '{
        "purpose": "Contact data disclosure request",
        "redirect_uri": "https://www.example.com/signing/done",
        "postback_url": "https://www.example.com/hooks/eeid-signing",
        "signer": { "id_code": "40504040001", "country_code": "EE" },
        "documents": [
          {
            "filename": "contract.pdf",
            "mime_type": "application/pdf",
            "content": "JVBERi0xLjQKJc..."
          }
        ]
      }'
Response
{
  "signing_uuid": "d51dfc24-3060-4e03-8086-66886022d04f",
  "session_token": "TgElGo4lzD99XIIfKd-3JEkc6vNWzFxFkVnUVY9ZgpM",
  "sign_url": "https://auth.eeid.ee/sign/TgElGo4lzD99XIIfKd-3JEkc6vNWzFxFkVnUVY9ZgpM",
  "ingest_mode": "full_file",
  "expires_in": 1800,
  "status": "pending"
}
| Parameter | Required | Description |
|---|---|---|
documents |
yes, unless container or signing_uuid |
At most 10, at most 5 MB each. See below |
container |
instead of documents |
A signed ASiC-E, Base64-encoded, to add a signature to. At most 50 MB |
signing_uuid |
instead of documents |
A signing eeID already holds. Starts a new round on it — no documents, because eeID kept them. Use it when a round ended without a signature: re-uploading the same bytes makes a second signing record of the same document |
purpose |
no | What the signature is for. Shown on the signing page and on the signer's phone |
signer |
no | Who is expected to sign. With a Smart-ID document_number the signer is not asked to identify themselves and their device is prompted once instead of twice |
locale |
no | Which language the signing page opens in: et, en or ru. ui_locales is accepted as an alias, and a comma-separated list is taken first-usable-wins, so an OIDC ui_locales string passes through unchanged. An unrecognised value is ignored rather than refused, and the signer can always switch language on the page |
redirect_uri |
no | Where the signer goes when they leave the result page. Must be registered |
postback_url |
no | Where eeID tells your server what happened. Must be a public https address |
Sending documents, or only their digests
Full file — send content, the document Base64-encoded. eeID shows it to the signer, builds
the finished container and serves it back to you.
Hash only — send sha256, sha512 and byte_size instead, and no content. eeID never
receives the document; you show it to the signer and assemble the final container yourself
from the hashcode container eeID produces.
Pick full file unless you have a reason not to. Hash-only exists for documents you cannot hand to a third party, and it moves two jobs to you — showing the signer what they are signing, and merging the container — in exchange for eeID never holding the file.
A hash-only document
{
  "filename": "contract.pdf",
  "mime_type": "application/pdf",
  "sha256": "3HrAuqu4vi4g/WLhYsVVj/M04/H9CS52XugUKCfxZBo=",
  "sha512": "z4PhNX7vuL3xVChQ1m2AB9Yg5AULVxXcg/SpIdNs6c5H0NE8XYXysP+DGNKHfuwvY7kxvUdBeoGlODJ6+SfaPg==",
  "byte_size": 18
}
The digests are Base64 of the raw digest bytes, not hex. eeID derives the mode from what you send; a request that mixes files with digests is refused, because eeID either holds every document or none, and half of each is a container it cannot assemble.
A filename is a filename, not a path. Separators, .., leading dots and control characters
are refused: the name becomes an entry inside the signed container, and a container that writes
outside its extraction directory is not something eeID will sign for you.
Adding a signature to a signed container
Add a signature to a container that already has one
curl -X POST https://auth.eeid.ee/api/signing/sessions \
  -u "$EEID_CLIENT_ID:$EEID_CLIENT_SECRET" \
  -H "Content-Type: application/json" \
  -d '{
        "purpose": "Second signature on the contract",
        "redirect_uri": "https://www.example.com/signing/done",
        "container": "UEsDBBQACAgIAAAAAAA..."
      }'
Response — a new signing, and a new signer to send
{
  "signing_uuid": "8a2f4c11-77b0-4e52-9d14-2c61f0a3ee90",
  "session_token": "kK2mDq7pVn4tZ1sXbYcR8fLhJ0wEuQiA3oNgTzM5vBs",
  "sign_url": "https://auth.eeid.ee/sign/kK2mDq7pVn4tZ1sXbYcR8fLhJ0wEuQiA3oNgTzM5vBs",
  "ingest_mode": "full_file",
  "expires_in": 1800,
  "status": "pending"
}
Send container instead of documents and eeID adds a signature to a container that
already has one. That is all a multi-signature ASiC-E is: signatures sit side by side in the
same container, each over the same documents, and DigiDoc4 lists them.
Your service has to be permitted this, and is not by default: without
Allow several signatures on one document (enabling signing) a request
carrying container is refused with 403.
The documents are not sent again — eeID takes them out of the container, along with the media
type each one is declared as in META-INF/manifest.xml. The signatures already on it travel
through untouched, and what comes back has one more.
From the response onwards nothing is different: send the signer to sign_url, they pick a
method and sign, and you collect the container as usual. The next signer identifies themselves
on the signing page, so a different signer needs no extra parameter.
ingest_mode tells you which kind of container you sent. A complete ASiC-E carries the
documents, so ingest is full_file and eeID assembles the finished container for you. A
hashcode container carries none, so ingest is hash_only and you merge your own bytes into
the result, exactly as you would on a first signature.
One round at a time. Each round rewrites the container, so two signers starting from the same container produce two containers with one new signature each — and those cannot be combined. Feed the container from round N into round N+1, and wait for each to finish.
You may still hand out several sign_urls at once: the invitations are parallel and only the
signing itself is serialised. A headless prepare for a document another round holds answers
409, and on the hosted page the signer simply waits — eeID retries for about half a minute
before giving up, on the expectation that a round is seconds from finishing or minutes from
expiring.
Each round is its own signing_uuid. eeID does not relate them: it will not tell you that a
document has three signatures, because it holds three separate records. You can, because you
hold the container. Keep your own link between the rounds if you need to report on progress.
Which methods are offered
You do not choose. The methods and countries a service signs with are configured on the
service in eeID manager, and the signer picks among them — the same
arrangement as authentication, from the same auth_methods configuration, so the two cannot
drift.
The list is narrowed twice before a signer sees it: to methods that can produce a qualified
signature at all, and to those eeID has built a flow for — which today means Smart-ID. A
signing_method parameter on this endpoint is refused, rather than ignored, so that a
caller who sends one finds out.
Smart-ID+ is a separate method, not a variant of Smart-ID: in eeID it is the device-link flow, a deeplink into the app on mobile and a QR code on desktop. Signing drives the notification API only, so Smart-ID+ is not a signing method at all — it cannot be selected for signing even on a service that offers it for authentication. Showing the notification flow to somebody who picked Smart-ID+ would be a different experience billed as the one they chose.
What the signer sees
The page names the document, shows its SHA-256, shows your purpose, and links the document so
it opens in a new tab — a PDF is displayed there by the browser, anything else downloads, and the
signing page itself is never navigated away from. Nothing reaches the signer's device until they
have confirmed the document explicitly — a signature means nothing if the signer never saw what they
were signing, and that confirmation is the only way out of the first state.
Then their method runs. With Smart-ID their phone is asked twice: once to confirm which Smart-ID account signs, then for PIN2 with the verification code the page displays. The page says so before either prompt arrives.
The signer may open sign_url on a different device from the one that started the flow — it is
addressed by a token rather than a cookie precisely so a link can be handed over.
Learning the outcome
A postback
{
  "event": "signing_completed",
  "signing_uuid": "d51dfc24-3060-4e03-8086-66886022d04f",
  "status": "signed",
  "state": "COMPLETED",
  "signing_method": "smart-id",
  "signed_at": "2026-09-16T12:00:00Z",
  "container_hash": "53a027853a0c31210980fc65ff49ca02c9446d02568a6beb46756c68538e14df",
  "container_available": true
}
If you gave a postback_url, eeID POSTs to it:
| Event | Meaning |
|---|---|
signer_signed |
The signature arrived and the signer's device is released. The container does not exist yet |
signing_completed |
The container exists and validated. Collect it |
signing_failed |
The round ended without a signature. Refused, cancelled, unusable or invalid — state tells you which |
signing_failed is not always the last word. A round that failed technically can be tried
again on the same link: nothing was signed, so eeID keeps the document, the signer's confirmation
of it and their place in the flow, and the result page offers them Try signing again. If they
succeed, signing_completed follows and supersedes the failure. Handle postbacks so that the
latest one wins rather than treating the first signing_failed as final.
When a link is spent — cancelled, or the session expired — you do not have to upload the document
again to get another. POST /api/signing/sessions with signing_uuid and nothing else starts a
fresh round on the signing eeID already holds, and answers with a new sign_url and the same
signing_uuid, so it stays one record for one document. It works whether the last round failed,
was cancelled or simply ran out, and while the document is unsigned it also returns the signing to
pending. A document that already carries a signature is a countersignature, so the service must
be permitted several signatures per document.
A signer who cancelled is different: that was their own decision, and their link is spent. Both
arrive as signing_failed because you need the same thing from both — stop waiting — and both
read failed on the signing. To tell them apart, read signer_can_retry on the status response:
true only while the signer's link can still produce a signature. It is false for a cancellation,
false once the session has expired, and false while a signing is still in flight.
Do not rely on the redirect to tell you anything. It only fires if the signer chooses to come back, and they may have closed the tab — the signature is produced regardless — or opened the link on their phone while your session is on their laptop.
Verifying a postback
Verifying in Ruby
timestamp = request.headers['X-EEID-Timestamp']
expected  = 'sha256=' + OpenSSL::HMAC.hexdigest(
  'SHA256', client_secret, "#{timestamp}.#{request.raw_post}"
)

unless OpenSSL.secure_compare(expected, request.headers['X-EEID-Signature'].to_s)
  head :unauthorized and return
end
Your postback endpoint is public and unauthenticated: anything on the internet can POST to it, and
a service that acts on signing_completed would be acting on whatever arrived. Every delivery
carries X-EEID-Signature, an HMAC-SHA256 over "<X-EEID-Timestamp>.<raw body>" keyed with your
client secret, sent as sha256=<hex>.
Use the raw body, exactly as received. Reject a timestamp far from your own clock — the timestamp is inside what is signed so that a delivery captured today cannot be replayed at you tomorrow.
A delivery that does not answer 2xx is retried with backoff, so make handling idempotent. If delivery fails for long enough, ask instead.
Asking
Ask what happened
curl https://auth.eeid.ee/api/signing/sessions/d51dfc24-3060-4e03-8086-66886022d04f \
  -u "$EEID_CLIENT_ID:$EEID_CLIENT_SECRET"
status is pending, signed, failed or expired. A signer who refused or cancelled shows as
failed: from your side both mean the same thing — stop waiting. This answers from eeID's durable
record, so a signing that finished a day ago is still reported.
signer_can_retry says whether the signer's link can still produce a signature. A round that
failed technically can be tried again on the same link, and then signing_completed follows the
signing_failed you already received — so this is how you tell "failed, and they may yet sign"
from "failed, and that is the end of it". It is true only for a technical failure with a live
session: false for a cancellation, false once the session has expired, and false while a signing
is still in flight.
signatures lists every signature on the document, in the order they were collected — sequence,
signer, method, status and erased_at each. signer above is the first of them, kept for
callers written before a document could carry several. A document reads signed once anybody
has signed it, so a pending entry in signatures beside a signed status is a round still
waiting for its signer, not a contradiction.
Collecting the signed document
Collect the container
curl https://auth.eeid.ee/api/signing/sessions/d51dfc24-3060-4e03-8086-66886022d04f/container \
  -u "$EEID_CLIENT_ID:$EEID_CLIENT_SECRET" \
  -o contract.asice
An ASiC-E container carrying an XAdES signature with an RFC 3161 timestamp and an OCSP response — what "long-term valid" means, and what lets the signature still be verified years later when the certificate has expired.
In hash-only ingest this is the hashcode container instead: the same signature, with
META-INF/hashcodes-sha256.xml and -sha512.xml in place of the documents eeID never
received. Its filename ends in -hashcode.asice so it cannot be mistaken for a finished
document, and finishing it is the last step.
container_hash in the status response is the SHA-256 of that file, so you can prove which one
you received.
Keep your own copy. eeID stores the container for 30 days and then purges it; the record that the signing happened, and the digests of what was signed, remain.
Signing without eeID's page
For an interface of your own, with your own signing method. eeID never speaks to Smart-ID here and the signer never sees an eeID page.
Prepare
curl -X POST https://auth.eeid.ee/api/signing/sessions/$UUID/prepare \
  -u "$EEID_CLIENT_ID:$EEID_CLIENT_SECRET" \
  -H "Content-Type: application/json" \
  -d '{ "certificate": "MIIHQTCCBsigAwIBAgIQ...", "signing_method": "id-card" }'
Response
{
  "signing_uuid": "d51dfc24-3060-4e03-8086-66886022d04f",
  "state": "PREPARED",
  "digest_algorithm": "SHA512",
  "digest": "WKQbl4weJ6pZcJYqpsAQMY/06NYknwtAd/HjLMxydx9W...",
  "data_to_sign": "PGRzOlNpZ25lZEluZm8geG1sbnM6ZHM9Imh0dHA..."
}
You send the signer's signing certificate — eeID cannot fetch it, because it is not driving
the method — and receive the digest of the XAdES SignedInfo that eeID built.
signing_method is required here, and this is the only endpoint that takes it: there is no
signer page on this path, so nobody else can say which method signed. It must still be one the
service is configured for, but it need not be one eeID has built a flow for — you are driving
the device, so the ID card and Mobile-ID work here today.
For Smart-ID, note that the signing certificate is a different certificate from the authentication one: only the signing certificate carries non-repudiation and the qualified policy, so a certificate kept from a login cannot be reused here.
Submit the signature
curl -X POST https://auth.eeid.ee/api/signing/sessions/$UUID/sign \
  -u "$EEID_CLIENT_ID:$EEID_CLIENT_SECRET" \
  -H "Content-Type: application/json" \
  -d '{ "signature_value": "gKK+PrWSzFbFCy5UD2ej2Gfgkm..." }'
eeID verifies the signature against the prepared data before building anything around it, adds the timestamp and OCSP response, validates the result, and records it. The call is synchronous: there is no browser to keep responsive, and those round-trips happen inside the request.
Finishing a hash-only container
In hash-only mode the response carries hashcode_container — an ASiC-E whose data files have been
replaced by META-INF/hashcodes-sha256.xml and -sha512.xml, because eeID never had the files.
The same container is also what GET …/container serves for a hash-only signing, so this step
applies whether you drove the signing yourself or sent the signer to eeID's page.
To finish it: copy every entry, drop those two manifests, and add your own bytes. Two details are not cosmetic:
- the
mimetypeentry must stay first and stored (uncompressed), with no ZIP64 extra field — otherwise libdigidocpp refuses the container while other validators still call it valid, which is a bug you will find only when someone cannot open your document; - check each file's hash and size against the manifests before inserting it. Nothing else guarantees that the bytes you are adding are the bytes that were signed.
Purging and erasing
Two different requests, from two different people, and DELETE asks which one you mean.
| Call | What it does |
|---|---|
DELETE /api/signing/sessions/{uuid} |
Purge. The source documents and the signed container go. Who signed stays |
…?signer_id_code=<code> |
Erase one person. Their name and identity code go from the record |
…?erase_signers=true |
Erase everybody named on the document |
Neither destroys the record that a signing happened: the uuid, the status, the timestamps, the method and the document digests remain in every case. That record names nobody, and deleting it would erase the evidence eeID behaved correctly rather than anybody's personal data.
Purging
Purge: the content goes, the signers stay
curl -X DELETE https://auth.eeid.ee/api/signing/sessions/$UUID \
  -u "$EEID_CLIENT_ID:$EEID_CLIENT_SECRET"
Response
{
  "signing_uuid": "d51dfc24-3060-4e03-8086-66886022d04f",
  "purged": true,
  "purge": {
    "documents_removed": true,
    "container_removed": true,
    "signers_retained": [
      { "uuid": "9f1a5d2e-1111-2222-3333-444455556666", "sequence": 1 }
    ],
    "note": "The documents and the container are gone. Who signed is retained: this is a purge, not an erasure."
  }
}
For you finishing with a document — a contract you no longer need to hold. The content goes and the signing goes on saying who signed it.
This is not an erasure and does not answer one. If somebody has asked you to forget them, use one of the calls below; a purge leaves their name and identity code in eeID's record.
Erasing a signer
Erase one person
curl -X DELETE "https://auth.eeid.ee/api/signing/sessions/$UUID?signer_id_code=38001085718" \
  -u "$EEID_CLIENT_ID:$EEID_CLIENT_SECRET"
Response
{
  "signing_uuid": "d51dfc24-3060-4e03-8086-66886022d04f",
  "erased": true,
  "erasure": {
    "complete": true,
    "signatures_erased": [
      { "uuid": "9f1a5d2e-1111-2222-3333-444455556666", "sequence": 1 }
    ],
    "retained": null,
    "signers_remaining": false
  }
}
For a data-subject erasure request that reaches you. You are the controller for the signings you create; eeID is the processor, and this is eeID acting on your instruction.
A data-subject request comes from a person, not about a document, so name them. erase_signers=true
erases everybody on the document instead, for a request that covers all of them.
Their name and identity code go from the record, and the source documents with them.
The signed container goes too — the identity code is inside the signature itself, so a container left behind would keep it — unless somebody else signed the same document. Then it stays: it is the other signers' only proof that they signed, and deleting it would answer one person's request by destroying other people's records. Their code survives inside that container, which is why the response tells you rather than reporting a clean success.
Read the response rather than assuming. It reports what was erased and whether anything had
to be kept. For a document with a single signature nothing does, and erasure.complete is
true. Where several people signed, the container is the others' only proof that they signed, so
it stays and retained says so with the reason — eeID tells you when it could not finish,
because you are the one who has to answer the data subject.
Collect anything you need first. None of this can be undone.
Retention
| What | How long |
|---|---|
| The documents you sent | Until the container exists, then purged immediately |
| …on a service permitted several signatures | Until the container is purged |
| The signed container | 30 days |
| The record and the digests | Kept |
| The signer's flow state | 30 minutes, in memory, never on disk |
The container carries the documents, so eeID does not keep a second copy of them — unless your service may collect several signatures, because a further round needs the bytes to show the next signer what they are signing and to merge the container again. That is the cost of the capability: on such a service a document stays with eeID until its container is purged, rather than for minutes.
The identity code appears inside every qualified signature by design — that is what makes it attributable — so a signed container is personal data wherever it is stored, including in your systems.
Errors
| Status | Meaning |
|---|---|
400 Bad Request |
An unregistered redirect_uri, a method your service may not use, a filename that is a path, a document over the limit, a postback_url that is not a public address, or a signature that does not verify |
401 Unauthorized |
The client id or secret is wrong, or the service belongs to a different environment |
403 Forbidden |
Signing is not enabled for this service, or container was sent by a service not permitted several signatures on one document |
404 Not Found |
No such signing, or it belongs to another service. The two are one answer on purpose |
409 Conflict |
Either the signing has no open session — it expired 30 minutes after creation, so create a new one — or another signature is being added to this document right now, in which case try again shortly. The message says which |
422 Unprocessable Entity |
The signature was accepted but the container did not validate as a qualified signature. The signing is recorded as failed |
429 Too Many Requests |
Rate limited. Retry-After gives the seconds to wait |
502 Bad Gateway |
eeID could not reach a service it depends on. Retry later |
A container that does not validate is never returned. It would look like a signed document and not be one, which is worse than returning nothing at all.
Test environment
A service in the Test environment uses https://test-auth.eeid.ee. Test signings are free and
produce real containers signed with demo certificates — they validate as test signatures and
have no legal effect.
Smart-ID's demo accounts are documented at
sk-eid.github.io/smart-id-documentation/test_accounts.html.
The MOCK accounts answer without a phone, which is what makes an automated end-to-end test
possible.